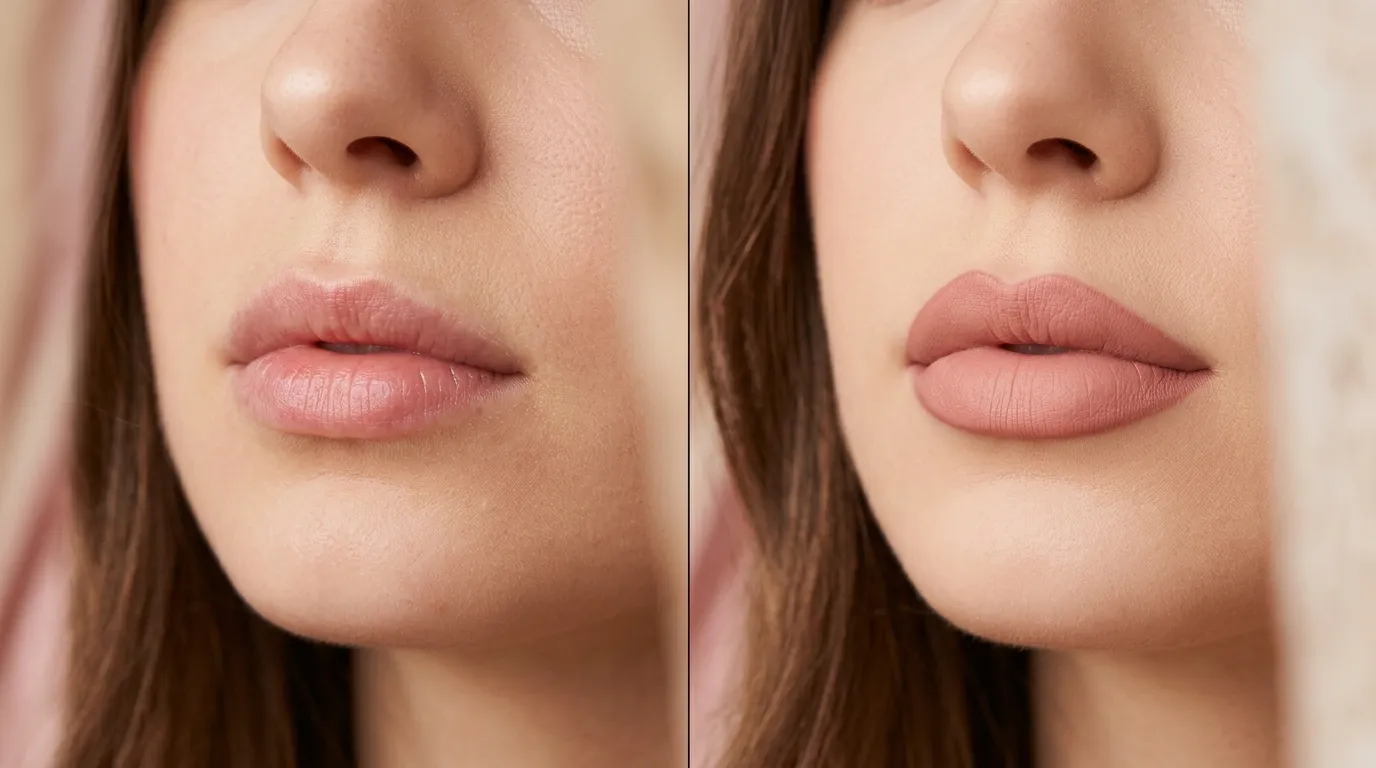
Lip Liner Tutorial: How to Make Your Lips Look Fuller Naturally 2026
If you’ve ever wondered how influencers and makeup artists get that soft, full-lip look without fillers, the answer is almost always a good lip liner tutorial and a few minutes of practice. Lip liner is the single most underrated tool in your makeup bag — it defines your lip shape, prevents lipstick from feathering, and can visually add volume to thin lips in under two minutes. Yet most people either skip it entirely or use it the wrong way, which is exactly why searches for a reliable, easy-to-follow guide keep climbing every year.
The truth is, a great lip look isn’t about buying more products. It’s about understanding a handful of small, repeatable techniques: how you prep your lips before you start, where you begin drawing your line, how far you can safely overline without it looking obvious, and which shade actually flatters your natural lip color and skin tone. Get those five things right, and lip liner stops being a “sometimes” step and becomes the one part of your routine that makes everything else — lipstick, gloss, even your overall face makeup — look more finished.
This guide walks you through a complete, beginner-friendly lip liner tutorial from start to finish: how to prep your lips, how to line them correctly, how to overline naturally for extra fullness, which shades work best for different lip shapes and skin tones, how lip liner compares to lip pencils and lip crayons, and the most common mistakes that make lip liner look obvious instead of effortless. By the end, you’ll have a repeatable, five-minute routine you can use for everyday makeup, special occasions, or as the finishing touch on a full soft glam look.
Why a Good Lip Liner Tutorial Starts With Lip Prep
Most people skip this step, and it’s the reason lip liner ends up looking patchy or cakey by lunchtime. Before the actual lining begins, your lips need three things: exfoliation, hydration, and a clean canvas. Skipping straight to the pencil is like applying foundation on unwashed skin — the product might go on fine at first, but it won’t hold up.
Exfoliate first. Dry, flaky lips grab pigment unevenly, so gently buff your lips with a soft toothbrush, a damp washcloth, or a dedicated lip scrub once or twice a week. This removes dead skin and gives you a smooth base for any lip pencil or lip liner to glide on cleanly, instead of catching on rough patches and creating uneven lines. If your lips are especially dry, do this the night before rather than right before applying makeup, so the skin has time to recover.
Moisturize, then blot. Apply a thin layer of lip balm, wait a minute for it to absorb, then blot off the excess with a tissue. Skipping the blot step is a common reason lip liner slips or feathers within an hour — the product has nothing to hold onto if your lips are too slick. A hydrating balm with shea butter or ceramides works well here, since heavier, waxy balms can actually make liner slide instead of stay put.
Even out your lip tone with concealer. A light dab of concealer along your natural lip line neutralizes any darkness or unevenness and creates a fresh “canvas” that makes your chosen lip liner shade look truer and your lipstick application more precise afterward. This also gives you a visible guide to work from if your natural lip border is a little uneven or asymmetrical.
Consider a lip primer for special occasions. If you’re getting ready for an event where you need your lip color to last for hours — a wedding, a night out, or a full day of photos — a thin layer of lip primer before your liner adds an extra layer of grip and longevity, similar to how a makeup primer helps foundation last longer on the skin.
Once your lips are prepped, you’re ready for the part everyone actually searches for: the application itself.
Lip Liner Tutorial for Beginners: Step-by-Step Application

This is the core of any Lip Liner tutorial — the actual technique. It looks intimidating the first few times, but like any makeup skill, it becomes almost automatic after a week of practice. Follow these steps in order for a clean, natural finish.
- Warm up the pencil. Rub the tip of your lip liner between your fingers for a few seconds if it feels hard, or hold it in a closed fist for ten seconds so your body heat softens the tip. A slightly softened lip pencil glides on more evenly and reduces tugging, which matters most for beginners still getting used to the pressure needed.
- Find your cupid’s bow. Start at the highest point of your cupid’s bow and draw two small lines down to the center of your top lip, forming a soft “M” shape. Rest your elbow on a table or counter if your hand tends to shake — a stabilized arm makes a bigger difference than a steadier hand. This step alone is what most beginners get wrong in their first lip liner tutorial attempt, usually because they try to draw the whole top lip in one continuous stroke instead of building the shape piece by piece.
- Line the outer corners. Move to the outer corners of your mouth and draw inward toward the center, following your natural lip border. Short, feathery strokes blend better than one long line, and they’re far easier to correct if one side comes out slightly different from the other.
- Do the bottom lip. Line the center of your bottom lip first, then work outward toward the corners, meeting the lines from your top lip. Keep your mouth relaxed rather than stretched, since a stretched lip changes its shape and can leave your line slightly off once your face returns to a neutral expression.
- Fill in slightly. Lightly fill in your lips with the liner before adding lipstick. This step extends your lip color’s wear time significantly and prevents visible lines if your lipstick fades throughout the day — it also means that if your lipstick wears off in the center after eating, what’s left underneath still looks intentional rather than patchy.
- Blend the edges. Use a small, clean lip brush, a cotton swab, or your ring finger to soften the outer edge so the liner blends into your natural lip color instead of sitting as a harsh outline. This one step is often the difference between a lip liner tutorial look that reads as “professional” versus one that reads as “obviously lined.”
- Apply lipstick or gloss. Whether you prefer matte lipstick, satin lipstick, or a sheer lip gloss, apply it directly over the lined and filled lips for a long-lasting, professional finish. For extra staying power, blot with a tissue and apply a second thin layer.
If you’re also working on a complete face routine, pairing this with a solid foundation guide ensures your base is even before you focus on lip detail. Follow this Lip Liner Tutorial to master precise application and create naturally preppy lips by subtly defining and enhancing your lip shape before applying your favorite lipstick or gloss. Finish with a complete eye look to balance your makeup so your lips remain the polished focal point without competing with heavy eye makeup.
Overlining Lips 101: How to Add Volume Without Looking Fake
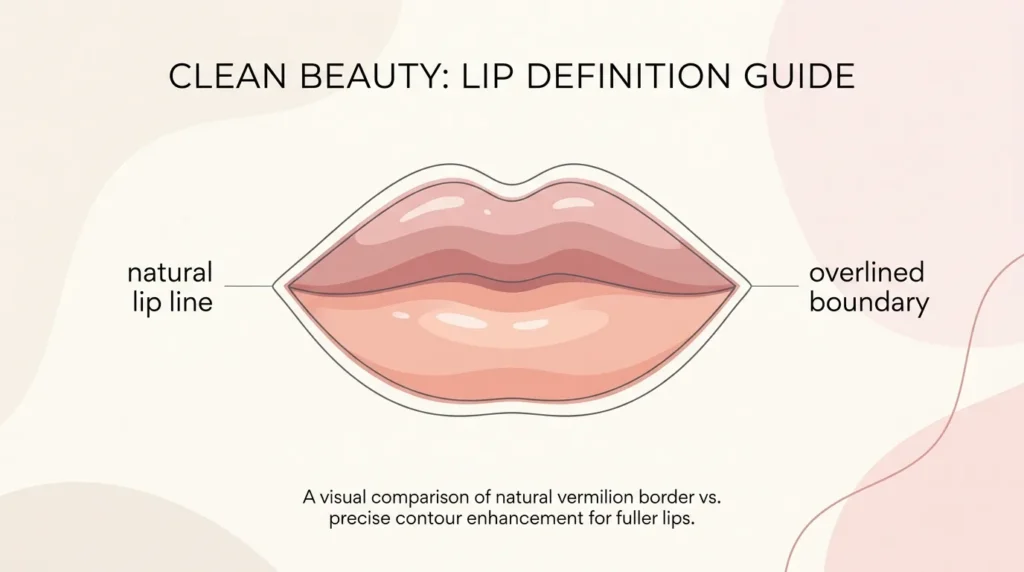
Overlining is the technique behind almost every “fuller lips without fillers” transformation online, and it’s a natural extension of any lip liner tutorial once you’re comfortable with basic application. It’s also one of the most-requested beauty skills online, because it promises volume without any needles, downtime, or cost beyond the pencil itself.
The golden rule: never go more than 1-2mm outside your natural lip line. Overlining lips by more than that starts to look obvious rather than naturally fuller, especially under flash photography or bright daylight where the gap between your real lip edge and the drawn line becomes much more visible.
Focus on the cupid’s bow and center of the bottom lip. These are the areas where slight overlining creates the most believable volume. Exaggerating the corners of your mouth, on the other hand, is what makes overlining look fake — keep the outer corners close to your natural lip shape.
Use a shade that matches your natural lip color, or one shade darker. A liner that’s too dark relative to your lipstick creates a visible ring, which is the biggest giveaway that lips have been overlined.
Blend immediately. Because overlined lips sit outside your natural border, that edge has no lip texture to blend into naturally. Use a damp beauty blender or a clean finger to soften the line the moment you draw it, before it sets.
Set with a light dusting of translucent powder around the very outer edge only, which helps the overlined shape hold without shifting during the day.
Done correctly, overlining is one of the best lip liner techniques for creating natural fuller lips, and it pairs especially well with a soft glam makeup style — if that’s your goal, this technique is a natural companion to a full soft glam tutorial, since soft glam looks rely heavily on defined, plush-looking lips.
Best Lip Liner Tutorial Techniques for Thin Lips (Plus Shade Guide)
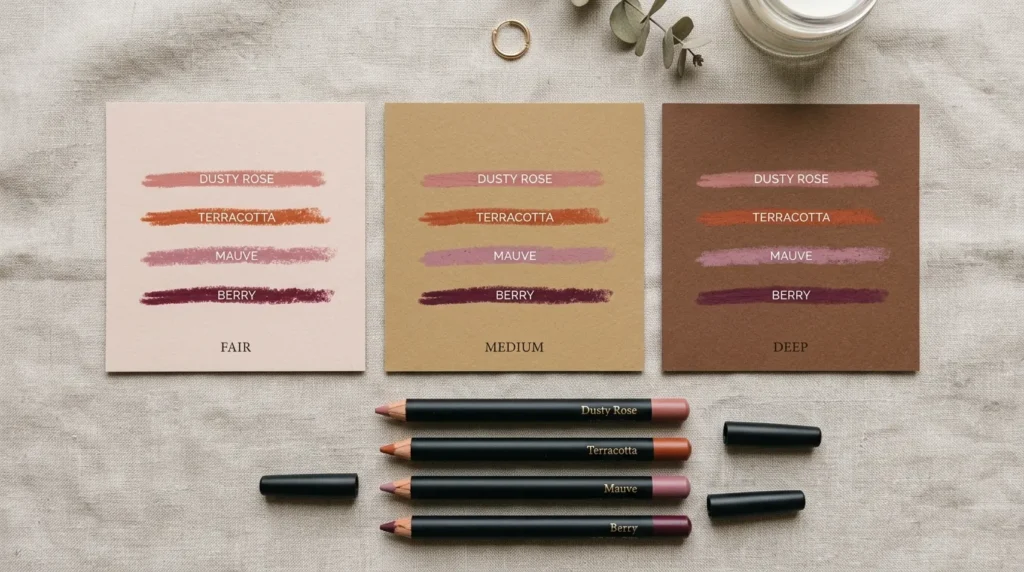
Lip liner for thin lips deserves its own section, since the technique differs slightly from a standard application. Thin lips aren’t a problem to fix — they’re simply a starting shape that responds especially well to the right combination of color, light, and placement, which is exactly why this part of the lip liner tutorial tends to get the most questions.
Skip the exact-match shade. For thin lips, choose a lip liner one shade lighter than your natural lip color rather than matching it exactly. Lighter shades reflect more light and create the illusion of extra volume.
Overline by a consistent 1mm all around, rather than focusing heavily on just the cupid’s bow. Thin lips benefit from balanced volume across the whole lip shape, not just one area.
Avoid deep or matte-heavy dark shades, which can make already-thin lips look smaller by absorbing light instead of reflecting it.
Add a touch of light, shimmery gloss to the center of the bottom lip after your lipstick. This creates a highlight effect that visually pushes the lip forward, making it look plumper in photos and in person.
Shade guide for thin lips:
- Fair skin tones: soft rose, dusty pink, or a warm nude lip liner
- Medium skin tones: terracotta, warm mauve, or soft brick
- Deep skin tones: rich berry, warm brown, or deep rose
For everyday wear vs. evening looks: during the day, keep overlining minimal (about 1mm) and pair it with a satin or sheer lipstick so the fullness looks natural in daylight. For evening or photos, you can push slightly closer to the full 2mm and use a slightly deeper, matte finish, since matte formulas photograph with more defined edges under flash.
Following these lip liner techniques consistently is one of the most requested beauty topics online, simply because thin lips respond so well to the right combination of shade, light overlining, and finish choice.
Lip Liner vs Lip Pencil vs Lip Crayon: Which One Should You Use?
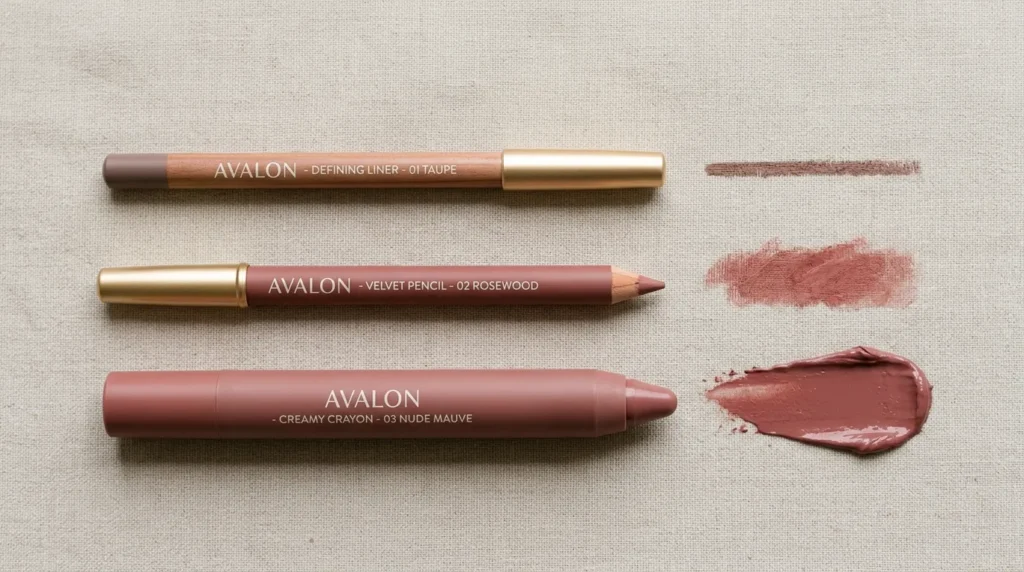
People often use “lip liner” and “lip pencil” interchangeably, but there are real texture and performance differences worth knowing before you buy.
| Feature | Traditional Lip Liner | Lip Pencil | Lip Crayon |
|---|---|---|---|
| Texture | Firm, precise | Semi-firm, smooth | Creamy, soft |
| Best for | Precise lining, overlining | Beginners, everyday use | Filling large areas, lips + liner in one |
| Wear time | Long-lasting | Moderate | Moderate to long |
| Ease of blending | Requires a brush | Blends easily with fingertip | Blends very easily |
| Ideal for thin lips | Yes, for fine detail | Yes | Less precise for fine lines |
| Beginner-friendly | Moderate | Very | Very |
If you’re just starting out, a Lip Pencil is usually the easiest entry point into any lip liner tutorial, since the softer tip forgives small mistakes and requires less pressure to deposit color. Once you’re comfortable, a traditional firm lip liner gives you the most control for overlining and sharp cupid’s bow definition, which is why most professional makeup artists reach for a firmer, retractable or sharpenable liner rather than a crayon for detailed work.
A quick buying tip: if you only own one lip product, a lip crayon is the most versatile, since it can double as both liner and lipstick in a pinch. But if your main goal is precise overlining or long-lasting definition, invest in a dedicated, firm lip liner alongside your regular lipstick or gloss.
Common Lip Liner Mistakes (And How to Fix Them Fast)
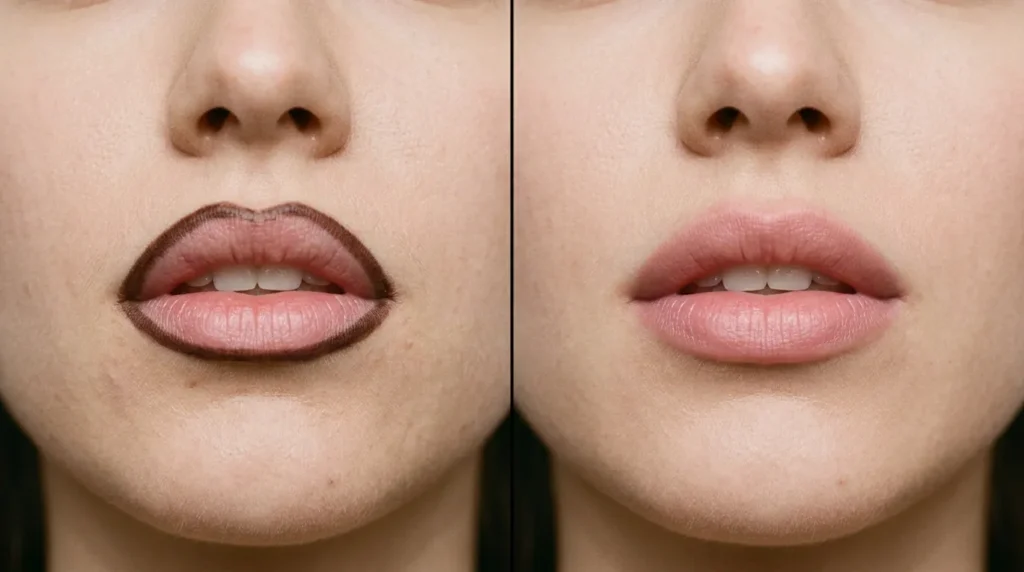
Even with a solid technique in hand, a few small errors can throw off the entire look. Knowing what to watch for is often what separates a look that photographs well from one that only looks good in the mirror.
Mistake 1: Choosing a liner too dark for your lipstick. This creates a visible outline instead of a seamless finish. Fix it by matching your liner to your lipstick or natural lip tone as closely as possible.
Mistake 2: Skipping lip prep. Applying liner on dry, flaky lips causes patchiness and tugging. Always exfoliate and moisturize beforehand.
Mistake 3: Drawing one long, shaky line. Short, connecting strokes are far more forgiving than trying to draw the whole lip border in one motion.
Mistake 4: Overlining too aggressively. Going more than 2mm past your natural lip line almost always looks unnatural, especially in daylight or high-resolution photos.
Mistake 5: Not filling in the lips before lipstick. This is the step that actually prevents feathering and makes your color last through meals and drinks — skipping it is one of the most common reasons lipstick doesn’t last.
Mistake 6: Forgetting to blend the edges. A hard, unblended line reads as “obvious makeup” rather than natural lip definition — a quick blend with a finger or brush fixes this instantly.
Mistake 7: Using an old, dried-out liner. Lip liner that’s past its prime can drag, skip, or apply patchy color no matter how careful your technique is. If your pencil feels scratchy or leaves gaps after several strokes, it’s time to replace it, generally every 12-18 months.
Mistake 8: Ignoring lip symmetry checks. Everyone’s natural lip shape has minor asymmetry, and that’s completely normal — but if you don’t glance at both sides in good lighting before you’re done, small differences can become more noticeable in photos. A quick side-by-side check in a well-lit mirror before you finish is enough to catch and correct any unevenness.
FAQs: People Also Ask About Lip Liner
Do you apply lip liner before or after lipstick?
Lip liner goes on before lipstick. Lining first defines your lip shape, prevents color from bleeding onto the surrounding skin, and gives lipstick a slightly textured base to grip onto, which noticeably extends how long your color lasts through the day.
How do you overline your lips without it looking obvious?
Stay within 1-2mm of your natural lip line, focus extra volume on the cupid’s bow and center of the bottom lip rather than the outer corners, and blend the edge immediately with a damp sponge or finger before it sets. Choosing a liner shade close to your lipstick color also keeps the overlined area from creating a visible ring.
What is the best lip liner for thin lips?
A shade one tone lighter than your natural lip color, in a creamy rather than heavily matte formula, tends to create the most natural-looking volume for thin lips, since lighter, more reflective textures visually push the lip forward instead of flattening it.
Can lip liner make your lips look bigger without filler?
Yes. Strategic overlining, light-reflecting shades, and a touch of gloss in the center of the bottom lip can visually enhance lip size without any injections. The effect is subtle rather than dramatic, but it’s a completely reversible, no-commitment way to test a fuller lip look before considering anything more permanent.
How long does lip liner last on the lips?
A well-prepped, properly filled-in lip liner application typically lasts 4-6 hours before needing a touch-up, depending on eating, drinking, and the formula used. Filling in the entire lip with liner before lipstick, rather than just outlining, is the single biggest factor in extending that wear time.
Is lip liner necessary for everyday makeup?
It’s not strictly necessary, but even a quick, natural lip liner application extends lipstick wear and gives a more polished, “your lips but better” finish for daily wear. Many people who skip it on busy mornings still keep a nude or your-lips-but-better shade on hand for exactly those five extra minutes when they want a slightly more finished look.
Do I need a different lip liner shade for every lipstick I own?
Not necessarily. A nude or your-lips-but-better shade works under most lipsticks and glosses, so it’s the most practical first liner to buy. As your collection grows, adding one or two shades closer to your most-used bold lipsticks helps avoid any visible mismatch around the edges.
Conclusion: Your Next Steps
Mastering a lip liner tutorial isn’t about a complicated ten-step process — it’s about a few consistent habits: prep your lips, line with short strokes starting at the cupid’s bow, blend the edges, and choose your shade based on your natural lip color and desired volume. Whether you’re working with thin lips or simply want longer-lasting color, these techniques give you fuller, more defined lips without a single injection.
Once your lip routine feels natural, it’s the perfect finishing touch for a full face look — pair it with a foundation guide for an even base, a complete eye look for balance, or go all the way with a soft glam tutorial where fuller, well-defined lips are the centerpiece of the whole look.
The best part about this lip liner tutorial is that it costs nothing beyond the products you likely already own. There’s no downtime, no appointment to book, and no commitment beyond a few extra minutes at your mirror. Practice the steps from this lip liner tutorial a handful of times, pay attention to which shade and overlining amount work best for your natural lip shape, and this quick lip liner tutorial routine will quickly become the fastest, most reliable way to make your lips look fuller, more defined, and more polished every single day.
