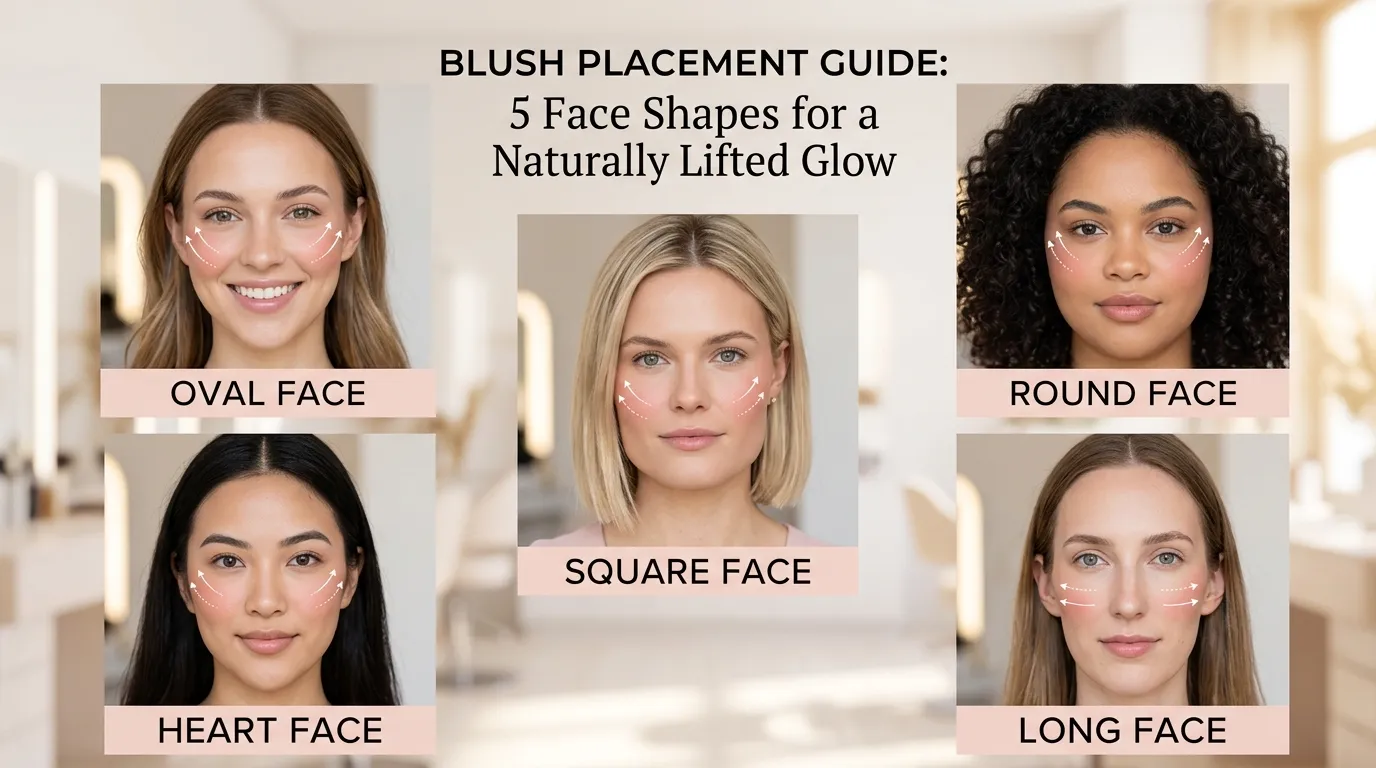
Blush Placement Guide: 5 Face Shapes for a Naturally Lifted Glow
If you’ve ever swiped blush onto your cheeks and ended up looking tired, flat, or oddly clownish instead of glowing, the product probably isn’t the problem — the placement is. A good blush placement guide does more for your face than a $40 palette ever will, because blush is the one product that can visually lift, contour, and soften your features in under 60 seconds, provided it lands in the right spot for your bone structure.
At Glow Beauty Lab, our team spends a disproportionate amount of time staring at cheekbones — on ourselves, on clients, on street-style photos — trying to reverse-engineer why some blush looks feel effortless and others feel like a costume. What we keep coming back to is this: face shape changes everything about where blush should sit. A technique that lifts a round face can flatten a long one. A placement that softens a square jaw can make a heart-shaped face look top-heavy. This blush placement guide breaks that logic down shape by shape, tool by tool, so you’re not guessing every morning.
We’ll walk through the actual mechanics of application, the “draping” technique makeup artists use to sculpt cheekbones, how cream, powder, and liquid formulas behave differently on skin, and where beginners tend to go wrong. There’s a comparison chart, a full FAQ pulled from what people actually search for, and image direction at the end of each section if you’re building this out visually.
What Is a Blush Placement Guide, and Why Does Placement Matter More Than Product?
A blush placement guide is essentially a map — it tells you which part of your face to target based on your bone structure, so the color reads as a natural flush rather than a stripe of pigment. Blush works by mimicking the body’s own physiological response: when you’re warm, embarrassed, or exercising, blood rushes to the apples of your cheeks and the tops of your cheekbones. Applying blush anywhere else on the face doesn’t read as “natural” to the human eye, because it doesn’t match where a real flush would occur.
This is why two people can own the exact same blush shade and get completely different results. Someone with a round face who smiles and applies blush straight onto the apples of the cheeks will often widen the face further. Someone with a long face doing the same thing may elongate it even more. Facial symmetry, cheekbone height, and jaw width all change the “correct” answer, which is exactly why a face-shape-specific approach outperforms a one-size-fits-all tutorial.
There’s also a semantic layer people miss: blush placement interacts with contour, bronzer, and highlighter. If your contour sits under the cheekbone and your color lands in the wrong zone, the two products fight each other and muddy the transition instead of blending into a soft glam finish. Getting this interaction right is part of why so many people search for a dedicated placement resource rather than a generic “how to apply blush” tutorial, since bronzer and contour placement change what “correct” blush placement even means on a given face.

How to Apply Blush the Right Way: Tools, Prep, and Technique
Before Face shape even enters the conversation, technique determines whether blush looks blended or blotchy. Three tools dominate: a fluffy blush brush for powder, a damp beauty blender or fingertips for cream, and a smaller dense brush for liquid drops. Each behaves differently, which is why the “right” tool question comes up almost as often as the placement question itself.
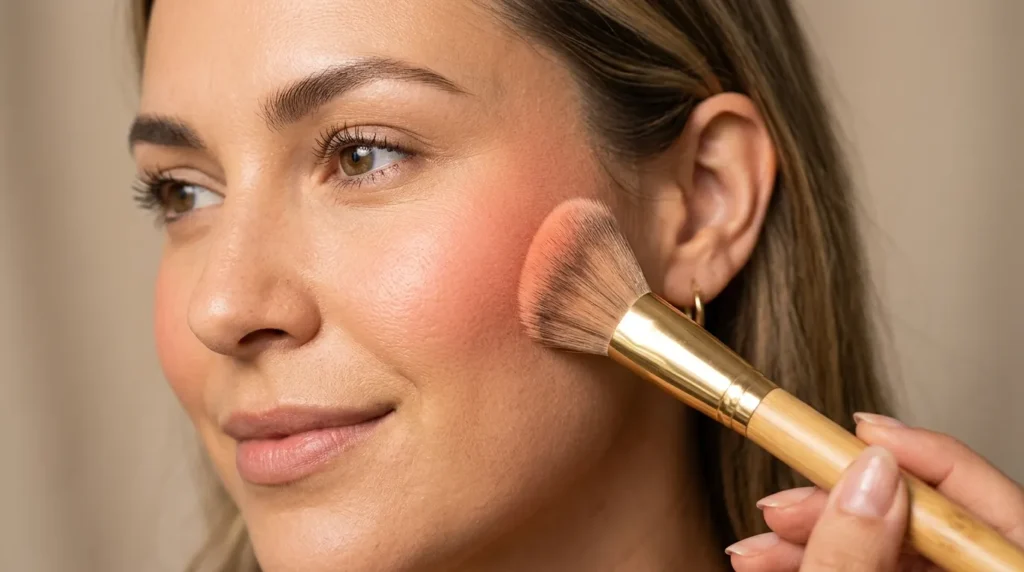
Start with clean, moisturized skin — cream and liquid blush grab onto dry patches and emphasize texture, so a light layer of moisturizer or primer first prevents patchiness. Smile naturally to locate the apples of your cheeks, then work backward toward the temple, following the natural curve of the cheekbone rather than dragging color straight across the face horizontally. Horizontal application is the single most common mistake in blush placement, because it fights the face’s natural contours instead of following them.
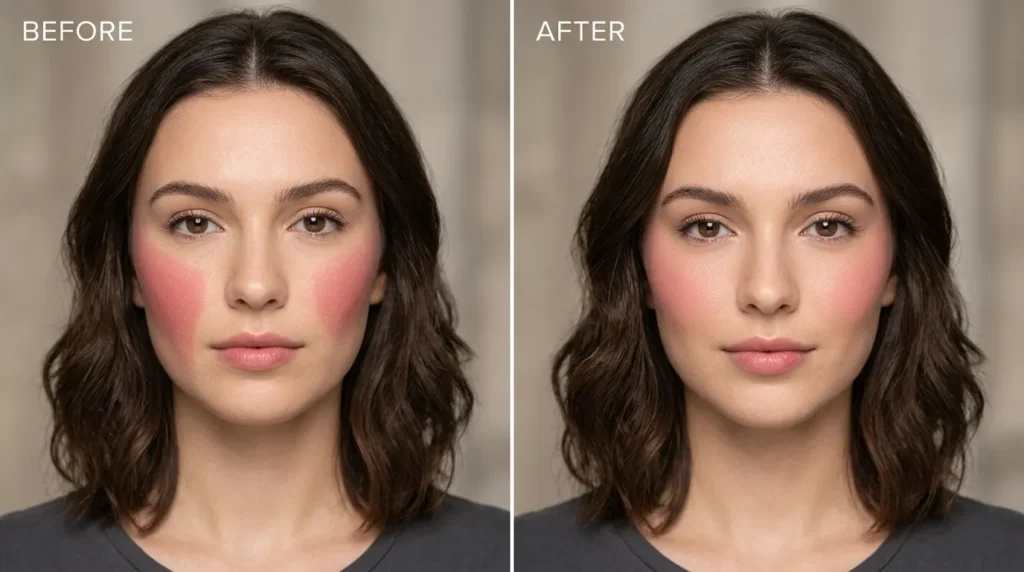
Build in thin layers. It’s far easier to add a second pass of pigment than to remove an over-applied patch, especially with cream and liquid formulas that stain slightly on contact. Blend the edges outward and upward toward the hairline — this “upward” motion is the foundation of what’s known as the lifting technique, and it’s the single biggest lever for making tired-looking skin appear more awake.
Numbers help here: most makeup artists recommend starting with roughly a pea-sized amount of cream blush or two light taps of a powder brush, then building up. Reapplying three to four times with a light hand almost always looks better than one heavy application.
Temperature and lighting matter more than most people expect, too. Applying makeup under harsh overhead bathroom lighting tends to make people overcompensate with color, because that lighting flattens the face and washes out natural warmth. Working near a window with indirect daylight, or under a ring light set to a neutral white balance, gives a far more accurate preview of how the final look will read outdoors or on camera. If you only have overhead lighting available, applying slightly less than feels “right” is usually the safer call — you can always add a second light layer once you’ve stepped into better light and checked.
It also helps to separate your base routine from your blush routine mentally. Foundation, concealer, and powder should be fully set before blush goes on, since applying color over wet or half-set base product causes patchy, uneven pickup — the pigment grabs unevenly wherever the base is still tacky. Waiting even 60 to 90 seconds after setting powder before starting your blush application solves most of this. For anyone working with two formulas in one look — say, a cream blush under a light dusting of powder blush for longevity — always apply cream first and let it set for a minute before layering powder on top, never the reverse.
Blush Placement Guide by Face Shape: Round, Oval, Square, Heart, and Long
This is the core of the whole conversation around face-shape-specific application — the actual shape-by-shape breakdown. Face shape is generally determined by comparing the width of your forehead, cheekbones, and jaw, plus the overall length of your face relative to its width. A quick way to check at home: pull your hair back, look straight into a mirror, and trace the outline of your face on the glass with a washable marker or your finger — the resulting shape usually falls into one of the five categories below. Once you know your shape, the placement logic becomes almost mechanical, and you can stop relying on generic tutorials that assume everyone’s bone structure is identical.
Blush Placement for Round Face
A round face has similar width and length, with soft angles and full cheeks. The goal here is to elongate and add definition rather than emphasize roundness. Apply blush slightly higher and angled diagonally toward the temples, starting just above the apple of the cheek rather than directly on it. Avoid circular application on the roundest part of the cheek — it visually widens the face. Instead, think in diagonal strokes that sweep up and out, which is the most requested technique searched under “blush for round face.”
Blush Placement for Oval Face
Oval faces are considered the most proportionate shape, so placement is more forgiving. Apply blush directly on the apples of the cheeks and blend outward toward the ear, following the cheekbone’s natural curve. Because an oval face doesn’t need correcting so much as enhancing, this is often the easiest starting point for a beginner blush tutorial.
Blush Placement for Square Face
Square faces have a strong, angular jawline and forehead of similar width. Blush should focus on softening those angles — apply in a circular motion on the apples of the cheeks and blend upward and outward toward the temples, avoiding harsh lines near the jaw. This softens the squareness without erasing the natural definition that makes square faces striking.
Blush Placement for Heart Shaped Face
A heart-shaped face is widest at the forehead and narrows toward a pointed chin. Placement here should balance the lower half of the face — apply blush lower on the cheeks, closer to the outer corners of the mouth, and blend outward rather than upward toward the temple. This visually widens the lower face slightly and balances a broader forehead.
Blush Placement for Long Face
Long faces are longer than they are wide, often with a longer chin or forehead. The goal shifts from lifting to widening. Apply blush horizontally across the apples of the cheeks, blending toward the ears rather than up toward the temples, which shortens the visual length of the face instead of elongating it further. This is the one shape where the “upward and out” rule from earlier sections is intentionally broken.

Draping Technique: The Lifting Blush Method Pros Use
The draping technique is a professional method where blush, bronzer, and sometimes highlighter are applied together in one sweeping motion from the cheekbone up to the temple, blending the products into each other rather than treating them as separate steps. Instead of a single dot of color on the apple of the cheek, draping “drapes” pigment across a wider diagonal band, which reads as more sculpted and lifted on camera and in person.
To try it, sweep bronzer from the hairline down along the temple, transition into blush right at the top of the cheekbone, and finish with a touch of highlighter just above that. Blend the three seamlessly with a fluffy brush so there’s no visible line between them. This is the technique behind the “lifted” look associated with soft glam makeup, and it’s especially effective on round and square face shapes where diagonal movement does most of the corrective work.
Draping also solves a common problem: blush that looks good in photos but flat in person, or vice versa. Because the technique blends warmth (bronzer), color (blush), and light (highlighter) into one continuous gradient, it holds up under both natural light and flash photography — a detail that matters if you’re applying makeup for events documented heavily on camera.
The order of operations matters more than most tutorials mention. Bronzer should go down first as the warmest, most diffuse layer, since it’s meant to look like sun-warmed skin rather than a defined shape. Blush goes second, placed with more intention and slightly more saturated color than the bronzer around it. Highlighter goes last, applied sparingly and only on the highest points of the cheekbone, because too much reflective product on top of two other layers of color tends to look greasy rather than lit-from-within.
A single fluffy brush, used to buff back and forth over the transition zones without adding more product, is usually enough to merge all three into one seamless gradient. If you only have a few minutes and can’t do the full three-step version, blush and highlighter alone — skipping bronzer — still gives a lighter version of the same lifted effect, just with less warmth.
Cream vs Powder vs Liquid Blush: Which Placement Works Best for Each
Formula changes technique slightly, even when face shape placement stays the same. Cream blush blends best with fingertips or a damp sponge, melts into skin for a dewy makeup finish, and works especially well on drier skin types. Powder blush is more forgiving for beginners, layers easily, and suits oily or combination skin because it helps set the base and control shine — ideal for a matte makeup look. Liquid blush dries fastest, requires quick blending in small dots before it sets, and gives the most natural-looking “your skin but better” finish, though it has the steepest learning curve of the three.
| Formula | Best Skin Type | Application Tool | Finish | Beginner Friendly |
|---|---|---|---|---|
| Cream Blush | Dry to normal | Fingers or damp sponge | Dewy, natural | Moderate |
| Powder Blush | Oily to combination | Fluffy brush | Matte to satin | Easy |
| Liquid Blush | Normal to dry | Fingers or small brush | Natural, skin-like | Harder |
Whichever formula you choose, the face-shape placement rules from the previous section still apply — formula changes texture and staying power, not the geometry of where color should go.
Blush Placement Guide Mistakes Beginners Make (and How to Fix Them)
Even with the right shade, a few habits quietly undo good blush placement. The most common is applying color too low, near the mouth, which drags the whole face downward instead of lifting it — a mistake this blush placement guide specifically warns against for round and oval faces. A close second is over-blending into the hairline, which can make blush look like sunburn rather than a natural flush.
Skipping a mirror check in natural daylight is another frequent issue — blush that looks subtle under warm bathroom lighting can look intense outdoors, so a quick check near a window before leaving the house prevents most “too much blush” moments. Beginners also tend to match blush placement to a tutorial they saw online without adjusting for their own face shape, which is exactly the gap this guide is meant to close: a technique built for a heart-shaped face won’t automatically flatter a long one.
Finally, using too much product at once rather than building gradually is the single most reversible mistake — start light, use natural daylight to check, and add more only if needed.
Frequently Asked Questions
Where should blush go on my face?
Blush should sit on the apples of your cheeks and blend up toward your temples for most face shapes, following the natural curve of your cheekbone rather than a straight horizontal line.
What is the best blush placement for beginners?
Smiling to find the apple of the cheek, then blending in small circular motions upward and outward, is generally considered the easiest starting point before layering in face-shape-specific adjustments.
Does blush placement really change based on face shape?
Yes — placement that lifts a round face can flatten a long one, and placement that balances a heart-shaped face can look off-center on a square one, which is the entire premise behind a face-shape-specific approach.
What is the draping technique in makeup?
Draping is a professional technique where bronzer, blush, and highlighter are blended together in one diagonal sweep from cheekbone to temple, creating a sculpted, lifted finish.
Is cream or powder blush better for natural-looking cheeks?
Cream blush generally gives a more natural, dewy finish because it melts into the skin, while powder blush offers more control and longer wear, especially on oilier skin.
How do I make my cheeks look lifted with blush?
Blend blush in an upward diagonal motion toward the temples rather than straight across the face, which visually lifts the cheekbones instead of widening them.
How much blush should I apply?
Start with a small amount — roughly pea-sized for cream or two light brush taps for powder — and build up gradually rather than applying it all at once.
Conclusion: Building Your Own Blush Placement Guide
Blush placement isn’t a universal formula — it’s a decision tree that starts with your face shape and adjusts from there based on formula, tool, and desired finish. Round faces benefit from diagonal, lifting strokes; long faces benefit from horizontal, widening ones; heart-shaped faces need balance lower on the cheek; square faces need softening; and oval faces are the most forgiving canvas of all. Once you internalize that logic, you stop following generic tutorials and start applying a blush placement guide that’s actually built for your bone structure.
For more face-mapping breakdowns and formula deep-dives, the Glow Beauty Lab community and the preppyglow archive both maintain ongoing guides on adjacent topics like contour placement and bronzer application, which pair naturally with everything covered here.
