Eye Makeup for Beginners 2026: A Complete Step-by-Step Guide From Liner to Smokey Eye
If you’ve ever stood in front of a mirror with an eyeshadow palette in one hand and a liner pencil in the other, completely unsure where to start, you’re not alone. Eye makeup for beginners can feel like learning a new language — crease color, transition shade, waterline, blending brush — and one wrong move can mean raccoon eyes instead of a soft smokey look.
This guide breaks eye makeup down into the same simple, repeatable steps that professional artists use, minus the jargon overload. By the end, you’ll know how to prep your lids, blend eyeshadow like you’ve been doing it for years, apply eyeliner without shaky lines, and put together looks that work for school, the office, or a night out. We’ll also cover what to do if you have hooded, monolid, or small eyes, since most beginner tutorials skip that part entirely.
This is the kind of practical, real-world guidance you’ll find across PreppyGlow’s beauty guides — tested techniques, honest product comparisons, and zero unnecessary steps.
The best eye makeup for beginners is a simple look with neutral eyeshadow, soft eyeliner, and mascara. It’s easy to apply, natural-looking, and perfect for everyday wear.
Eye Makeup for Beginners: Why It Feels Intimidating (And How to Fix That)
Most beginners don’t struggle because Eye Makeup is inherently hard — they struggle because they skip the groundwork. Two things separate a smooth, long-lasting look from a patchy, creased one: eyelid prep and having the right (small) set of tools.
Eyelid prep matters more than product quality. Oily lids cause eyeshadow to crease and eyeliner to smudge within hours, no matter how expensive the product is. Before applying anything:
- Cleanse the eye area to remove oil and leftover skincare product.
- Apply a thin layer of concealer or a dedicated eye primer and pat it in with a fingertip or makeup sponge. Primer creates a slightly tacky base that eyeshadow grips onto, which is the single biggest factor in how long a look lasts.
- Let it set for 30–60 seconds before applying color. Skipping this step is the number one reason beginner eyeshadow looks patchy by midday.
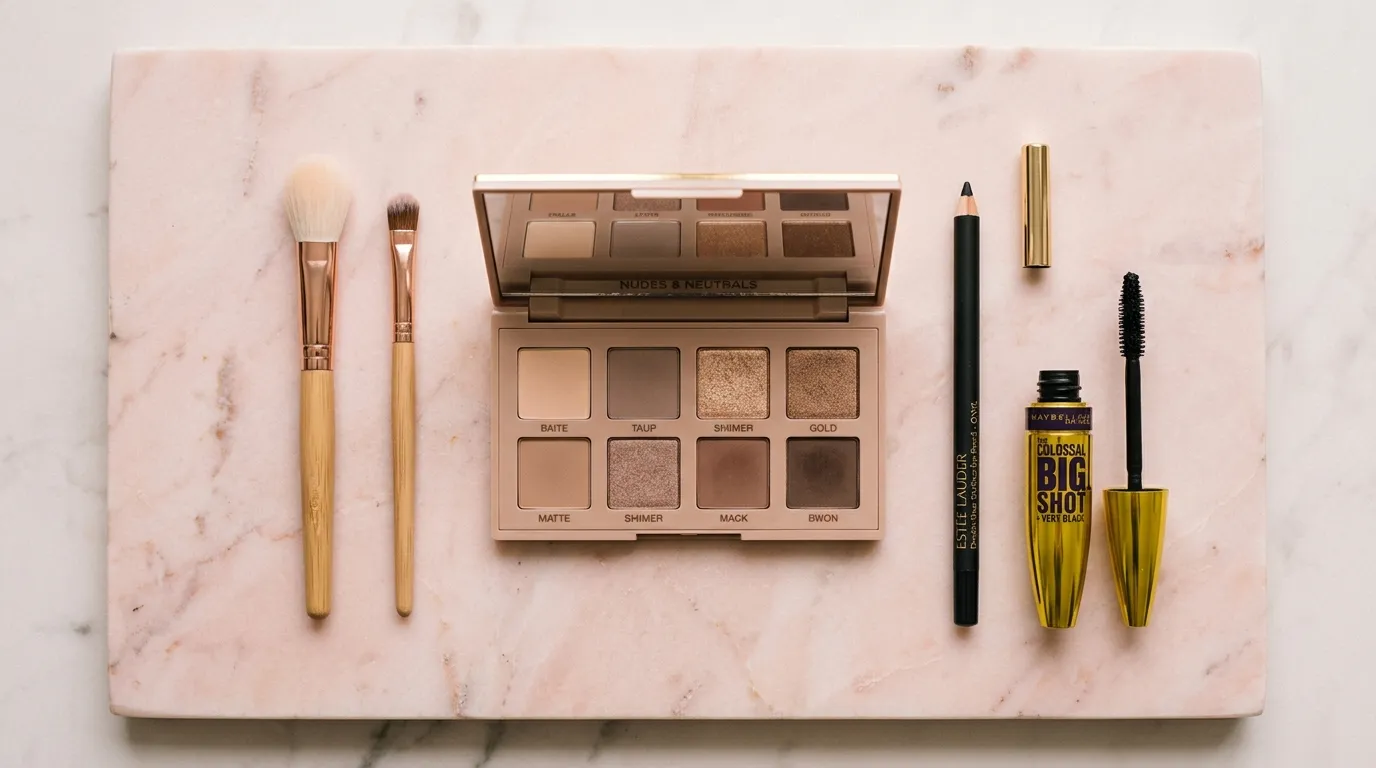
You don’t need 20 brushes. A beginner really only needs three: a flat shader brush (to pack color onto the lid), a fluffy blending brush (to soften edges), and a small pencil or angled brush (for the lower lash line and detail work). Buying a huge brush set often overwhelms new learners more than it helps.
Finally, keep a makeup remover or micellar water and a couple of cotton swabs nearby. Precision comes from being able to clean up small mistakes as you go, not from getting every line perfect on the first try.
How to Apply Eyeshadow Step by Step (Eye Makeup for Beginners)
Eyeshadow application intimidates beginners mostly because tutorials jump straight to five-shade blends. In reality, a great beginner eyeshadow look uses just three values: a transition shade, a mid-tone crease color, and a lid shade. With the right tools, eye makeup for beginners becomes quick, easy, and fun to learn.
These eye makeup for beginners tips will help you blend eyeshadow smoothly and apply eyeliner with confidence.
By following these eye makeup for beginners steps, you’ll build the skills needed for more advanced eye looks.
Choosing the Right Brushes: Eye Makeup for Beginners
- Flat shader brush: Dense and flat, used to pat pigment directly onto the lid. Patting (not dragging) keeps color from going patchy.
- Fluffy blending brush: Softer and more tapered, used only in the crease to diffuse harsh lines. This is the brush responsible for that soft, professional gradient look.
- Pencil brush: Small and precise, ideal for smudging liner or adding a pop of color to the lower lash line.
Building the Transition Shade and Crease Color
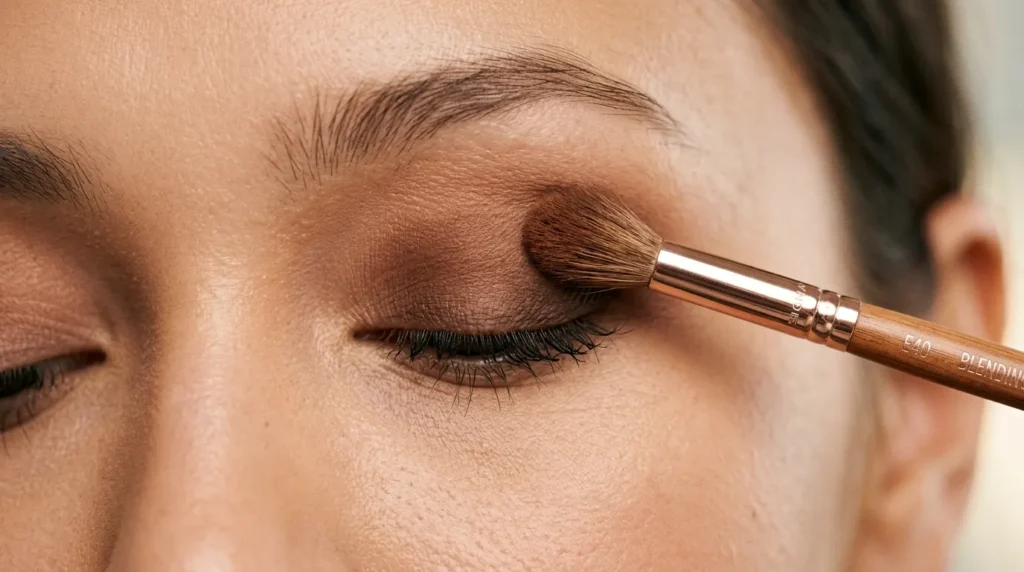
- Using the fluffy blending brush, sweep a matte transition shade (a neutral tone close to your skin color, slightly deeper) through the crease in a windshield-wiper motion. This shade has one job: to soften the transition between the lid and brow bone, which is why skipping it makes eyeshadow look flat.
- Add a slightly deeper matte shade just into the outer corner and crease, blending in small circles. This adds dimension without needing five different colors.
- Check your blending by looking at your lid straight-on in a mirror — there should be no visible hard line between shades.
Adding Shimmer or Matte Payoff to the Lid
- Using the flat shader brush, pack your main lid color (matte or shimmer) onto the center of the lid, patting rather than swiping.
- If using shimmer eyeshadow, apply it with a slightly damp brush or makeup sponge — this intensifies pigment and reduces fallout underneath the eyes.
- Add a touch of inner corner highlight (a pale shimmer shade) to the inner corners to open up the eyes, especially useful for smaller or closer-set eyes.
This three-shade method is the foundation for almost every eyeshadow look you’ll see referenced in beginner tutorials, and mastering it makes every future eyeshadow palette easier to use.
Eyeliner for Beginners: Pencil, Gel, and Liquid Techniques
Eyeliner is where most beginners lose confidence, mainly because pencil, gel, and liquid formulas all behave differently. Understanding those differences upfront prevents a lot of frustration.
Winged Eyeliner Tutorial for Beginners
- Start with a pencil or gel liner rather than liquid — they’re more forgiving and easier to correct.
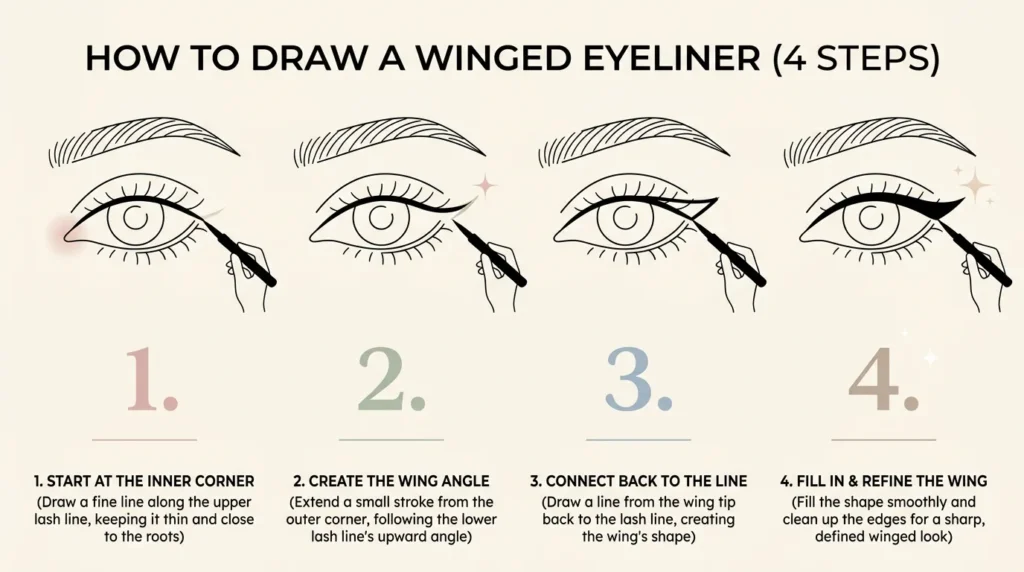
- Draw small dots along the upper lash line, staying as close to the lashes as possible, then connect the dots into a thin line.
- For the wing: place a small dot at the outer corner pointing toward the end of your eyebrow, then connect it back to the outer corner of your lash line, forming a small triangle.
- Fill in the triangle and thicken the line gradually from the outer corner inward, keeping the line thinnest near the inner corner.
- Once comfortable with pencil or gel, liquid eyeliner (felt-tip formulas are easiest for beginners) can be layered on top for extra precision and staying power.
Resting your elbow on a table while lining, rather than holding your arm in the air, dramatically improves line steadiness — a small adjustment most tutorials never mention.
Lower Lash Line and Waterline Tips
- For a soft, smudged look, use a pencil liner along the lower lash line and blend it slightly with a pencil brush or cotton swab.
- Lining the waterline with a nude or white pencil can make eyes look bigger and more awake, while a dark waterline liner intensifies a smokey look but can make small eyes appear smaller if overdone.
- Avoid tightlining (lining directly on the upper waterline) with liquid liner as a beginner — it’s a technique best introduced after you’re comfortable with basic lines.
Finishing Touches: Mascara, Lashes, and Brows
Eyeshadow and eyeliner do a lot of the work, but mascara, lashes, and brows are what pull a beginner look together and make it look finished rather than “in progress.”
Curling Lashes and Applying Mascara Without Clumps
- Curl lashes before applying any mascara — curling over mascara can cause lashes to stick to the curler and break.
- Hold the curler at the base of the lashes, squeeze gently for a few seconds, then release and repeat slightly further up the lash for a natural curve.
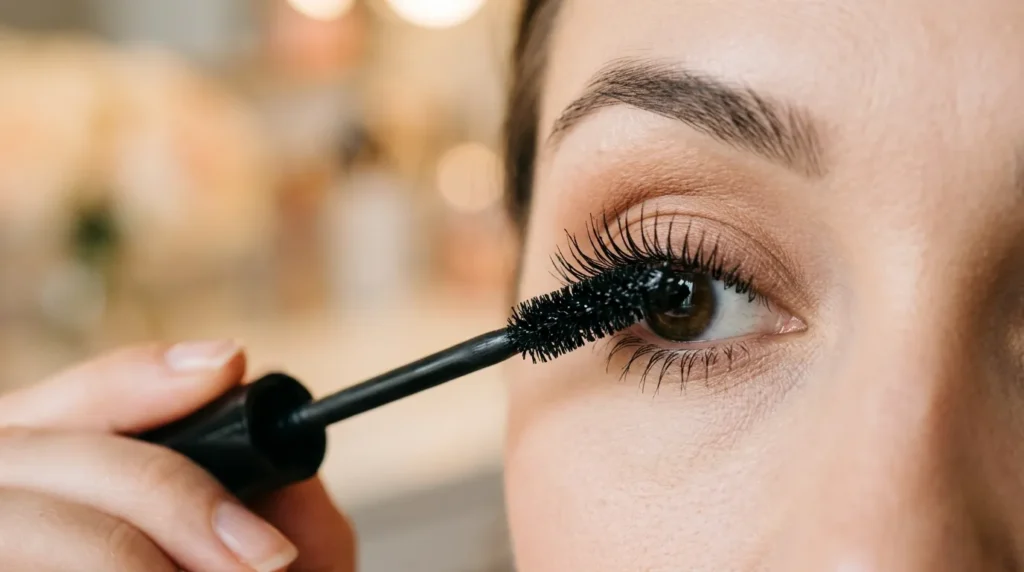
- Apply mascara starting at the base and wiggling the wand side to side as you move upward, which coats lashes evenly and reduces clumping.
- For a fuller look without heaviness, apply two thin coats rather than one thick one, letting the first coat dry slightly between applications.
False Eyelashes for Beginners
Full-strip lashes can be tricky at first, so beginners often find better results starting with individual clusters or half-strips placed only at the outer corners for a subtle lift.
- Measure the lash strip against your natural lash line and trim any excess from the outer edge.
- Apply a thin line of lash glue and let it sit for 20–30 seconds until tacky (applying it too wet causes slipping).
- Place the lash as close to your natural lash line as possible, starting from the center and pressing down at the inner and outer corners last.
Shaping Brows With Pencil and Gel
Well-groomed brows frame the entire eye look. Use a brow pencil to fill in sparse areas with short, hair-like strokes rather than solid lines, then set brows in place with a clear or tinted brow gel brushed upward and slightly outward. This single step often does more to “finish” a beginner look than any additional eyeshadow.
Easy Eye Makeup Looks by Eye Shape and Occasion
Once the basic techniques feel comfortable, the next step is adapting them to your eye shape and the occasion — something most generic tutorials skip entirely.
Natural Everyday Eye Makeup
For school, work, or errands, keep it simple: a neutral transition shade, a thin brown or black eyeliner along the upper lash line only, two coats of mascara, and groomed brows. This look takes under five minutes once the technique becomes familiar and works with nearly any outfit.
Beginner Smokey Eye Tutorial
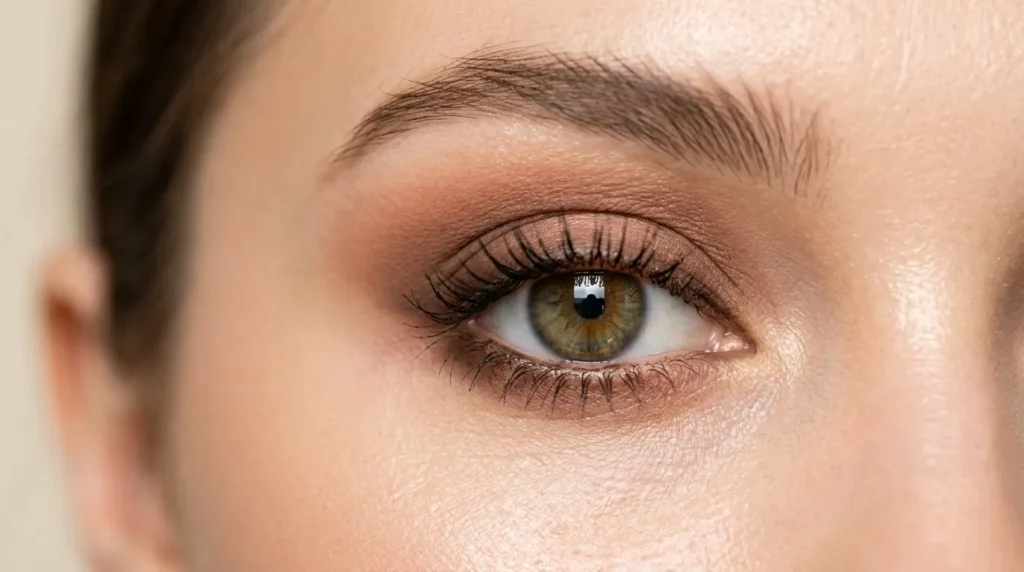
- Apply a matte transition shade through the crease as described earlier.
- Add a deeper matte or shimmer shade to the outer third of the lid and outer crease, blending in small circular motions.
- Smudge a soft pencil liner along the upper and lower lash lines, then blend with a pencil brush for a diffused, smoky edge rather than a harsh line.
- Finish with mascara and, optionally, a few individual false lashes at the outer corners for extra drama.
The key to a beginner-friendly smokey eye is blending in stages and building color gradually — it’s far easier to add more than to remove excess pigment.
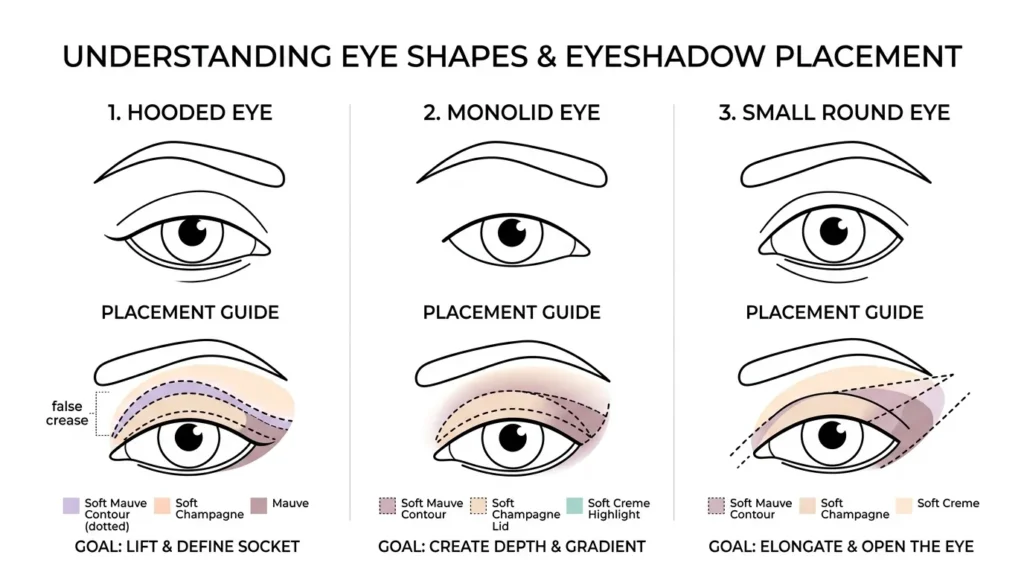
Eye Makeup for Hooded, Monolid, and Small Eyes
- Hooded eyes: Apply crease color slightly above where the crease appears when eyes are open, since the natural crease is often hidden when eyes are open. Keep liner thin, as thick liner can disappear under the hood.
- Monolid eyes: Skip the traditional crease technique and instead focus on gradient blending across the whole lid, darkest at the outer corner, fading toward the inner corner.
- Small or round eyes: Extend eyeshadow slightly beyond the outer corner and add a soft wing to elongate the eye shape, and keep waterline liner light or skip it to avoid visually shrinking the eye.
Common Eye Makeup for Beginners Mistakes to Avoid
- Skipping primer: leads to creasing within a few hours, regardless of eyeshadow quality.
- Dragging instead of patting shimmer shadow, which causes patchy, uneven color.
- Applying liquid liner before mastering pencil or gel, which often results in shaky, overly thick lines.
- Using too much product on the brush at once instead of building color gradually in thin layers.
- Not blending in stages — trying to blend a finished smokey look all at once instead of blending each shade before adding the next.
- Ignoring eye shape and copying a look exactly as shown on a model with a different eye shape, rather than adapting placement.
Comparison Table: Eyeliner Types for Beginners
| Eyeliner Type | Ease of Use | Best For | Common Mistake |
|---|---|---|---|
| Pencil | Easiest — most forgiving, smudges for a soft look | Everyday looks, lower lash line, waterline | Pressing too hard, causing a thick, unintentional line |
| Gel | Moderate — precise with a good angled brush | Winged looks, more defined everyday lines | Applying with a brush that’s too stiff or too soft |
| Liquid | Hardest — least forgiving, dries fast | Sharp, dramatic wings once basics are mastered | Attempting a full wing before mastering pencil/gel first |
FAQ: People Also Ask
What eye makeup should a beginner start with?
A neutral eyeshadow palette with matte shades, a pencil eyeliner, and a basic mascara are the easiest starting products. Mastering a simple three-shade eyeshadow look before moving to liner and false lashes builds confidence faster than trying every product at once.
How do I stop my eyeshadow from creasing?
Apply a dedicated eye primer or a thin layer of concealer before eyeshadow, and set it with a light dusting of translucent powder if your lids are especially oily.
What’s the easiest eyeliner style for beginners?
A thin line along the upper lash line using a pencil or gel liner, without attempting a winged tip, is the easiest and most forgiving starting point.
How can I make my eyes look bigger with makeup?
Use a light or white pencil on the waterline, add an inner corner highlight, and keep liner and shadow thinnest near the inner corner while building depth toward the outer corner.
Do I need false eyelashes for a beginner look?
No — two well-applied coats of mascara are enough for most everyday looks. False lashes (or even a few individual clusters) are optional for building extra volume on special occasions.
How long does it take to get good at eye makeup?
Most beginners notice a real improvement in blending and liner control within two to three weeks of practicing every few days, since these are motor skills that improve with repetition.
What is the best eye makeup for beginners?
The best eye makeup for beginners is a simple look with neutral eyeshadow, soft eyeliner, and mascara. It’s easy to apply, natural-looking, and perfect for everyday wear.
Conclusion
Eye makeup for beginners doesn’t require a huge collection of products or years of practice — it requires the right order of steps. Prep your lids, use just three brushes, build eyeshadow in three shades, practice eyeliner with a pencil before moving to liquid, and finish with mascara and groomed brows. From there, everyday looks and a soft smokey eye become variations of the same core technique, adapted slightly for your eye shape.
With regular practice, eye makeup for beginners becomes much easier. Start with simple techniques and gradually try more advanced looks.
For more beginner-friendly beauty breakdowns like this one, explore the full tutorial library on PreppyGlow, where every guide is built around the same simple, repeatable approach.
