Preppy Bracelets & Clay Bead Ideas: The Ultimate DIY Jewelry Guide
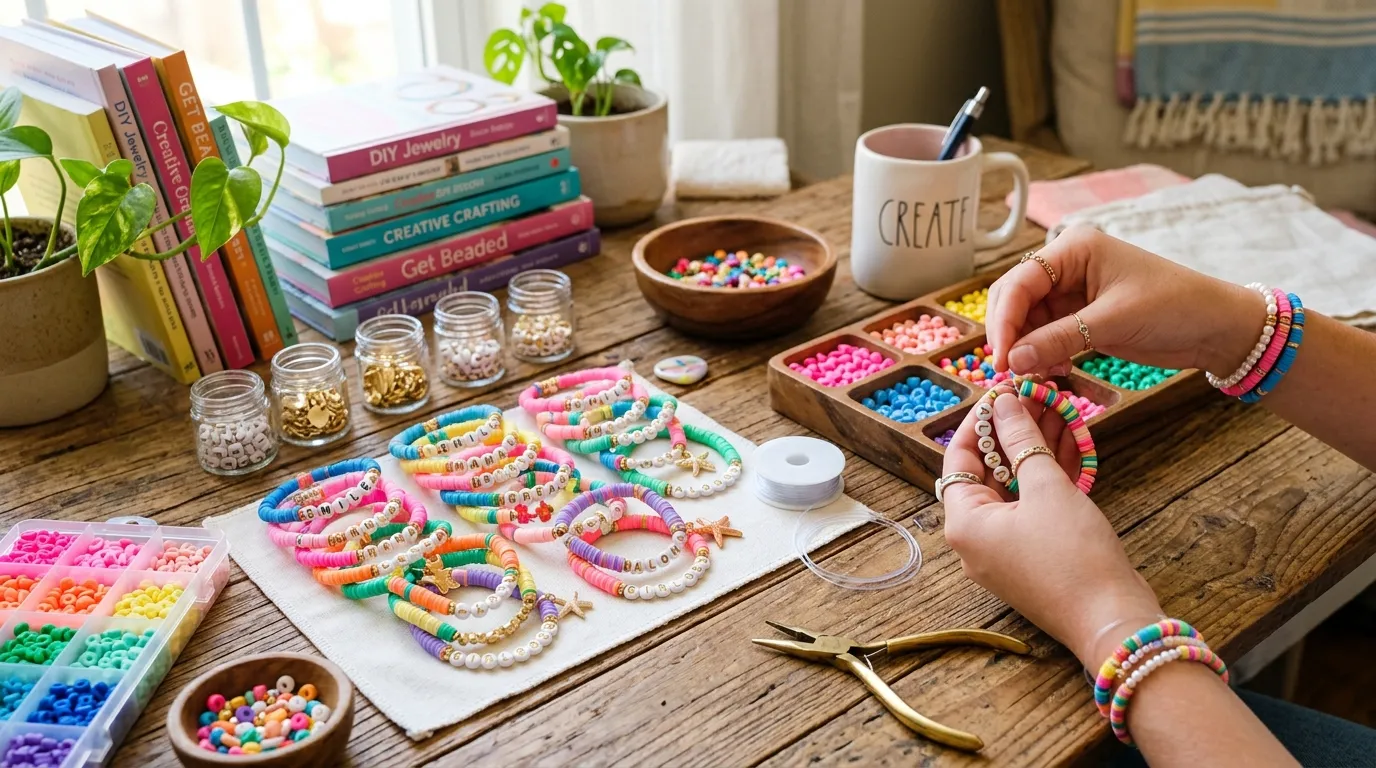
There’s something quietly addictive about making your own jewelry. Once you thread your first bead onto elastic cord and feel the satisfying snap as the bracelet slips onto your wrist, the hobby has you. Preppy bracelets in particular have a way of becoming an obsession – they’re colorful, stackable, endlessly customizable, and deeply tied to a broader aesthetic that millions of people genuinely love. Whether you’re new to the preppy aesthetic DIY world or you’ve already filled an entire jewelry box, this guide covers everything you need to know about making, styling, and gifting these handmade accessories.
What Exactly Are Preppy Bracelets – And Where Did They Come From?
Preppy bracelets are beaded, woven, or charm-based accessories that reflect the color palette, patterns, and sensibility of the preppy aesthetic: think pastel colors, nautical motifs, gingham patterns, monogram accessories, and a general air of polished-but-playful. They’re the kind of jewelry that pairs equally well with a crisp collared shirt and a casual oversized hoodie.
The preppy aesthetic itself has roots in Ivy League college culture of the 1950s and 60s, when American universities like Harvard, Yale, and Princeton developed a recognizable student dress code – boat shoes, polo shirts, cable-knit sweaters, and tasteful accessories. The jewelry side of this culture leaned toward simple, classic pieces: pearl strands, thin gold chains, and eventually the colorful friendship-style bracelets that became iconic in the 1980s.
Clay bead bracelets entered the picture as a more modern, tactile evolution of that tradition. They exploded on platforms like Pinterest and TikTok in the early 2020s, when the cottage-core and Y2K revival movements intersected with preppy aesthetic DIY content. Suddenly, making your own cute beaded bracelets wasn’t just a camp activity – it was a legitimate creative outlet that aligned perfectly with the handmade, personalized approach the younger generation was bringing to fashion.
If you want a deeper dive into the history and style codes behind this look, Preppyglow is one of the most thorough resources on what the preppy aesthetic actually means in a modern context.
Why DIY Preppy Bracelets Are Having a Moment Right Now
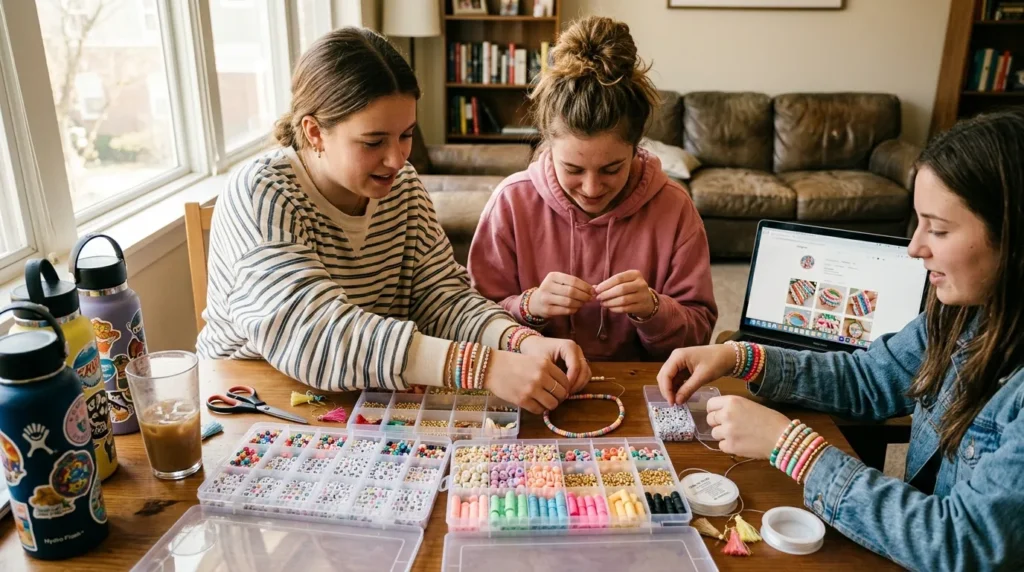
The timing makes sense when you look at what’s driving craft culture broadly. People are spending more intentionally. They’re drawn to things that feel personal and handmade over mass-produced fast fashion. And they’re sharing their creative process online, which creates a feedback loop where one person’s bracelet stack on Instagram inspires ten more people to pick up acrylic paint and polymer clay.
Specific factors fueling the trend:
- Personalization over product – monogram accessories, initials, and custom color schemes make each bracelet feel like it was made for someone, not just purchased.
- Cost – the materials for a full set of cute beaded bracelets can cost less than a single store-bought piece, making budget-friendly DIY crafts genuinely appealing.
- Community – the back-to-school DIY wave every August brings a fresh wave of teens learning to make bracelets for their friend groups.
- Pinterest room decor and aesthetic content – bracelet-making fits neatly into the broader aesthetic room decoration trend, since a well-arranged jewelry display can be part of your décor, too.
- Sustainability – making your own accessories reduces reliance on fast-fashion supply chains, which matters to a growing number of crafters.
Clay Bead Bracelets vs. Other Preppy Bracelet Styles: A Quick Comparison
Before diving into the how-to sections, it helps to understand the main types of preppy bracelets and what each offers. Here’s a breakdown:
| Bracelet Type | Materials Needed | Skill Level | Best For | Durability |
|---|---|---|---|---|
| Clay Bead | Polymer clay, elastic cord | Beginner–Intermediate | Colorful stacks, personalized sets | Medium (protect from heat) |
| Seed Bead | Glass seed beads, wire or thread | Intermediate | Detailed patterns, friendship sets | High |
| Woven / Friendship | Embroidery floss | Beginner | Classic preppy stripes, gifts | High |
| Pearl & Charm | Faux pearls, lobster clasp, chain | Beginner | Elegant layering, monogram accessories | Very High |
| Macramé | Waxed cord | Intermediate | Bohemian-preppy hybrid looks | High |
| Enamel Charm | Enamel charms, chain | Easy assembly | Statement pieces, nautical themes | High |
Each style has its place in a well-rounded bracelet stack. Most people who go deep into this hobby end up using all of them at different points.
The Essential Craft Supplies You’ll Need to Get Started
Gathering the right craft supplies before you start saves you from mid-project frustration. Here’s what a solid beginner kit looks like:
For clay bead bracelets:
- Polymer clay (a variety pack with pastel colors covers most preppy palettes)
- A clay conditioning roller or pasta machine
- Bead-forming tools or a blunt skewer
- A baking sheet lined with parchment paper
- Fine-grit sandpaper for smoothing cured beads
- Elastic cord (0.8mm or 1mm works for most bead holes)
- Jewelry glue or a surgeon’s knot for finishing
For seed bead or mixed-bead bracelets:
- Glass or acrylic beads in your chosen color palette
- Beading needle and thread or flexible beading wire
- Crimp beads and a crimping tool
- Lobster claw clasps or toggle clasps
For woven friendship-style bracelets:
- Embroidery floss in pastel colors (pink, blue, lavender, mint, yellow)
- Clipboard or tape to hold the work in place
- Scissors
Washi tape is surprisingly useful across all these projects – you can use it to mark bead positions, create pattern guides, or add decorative touches to your craft storage and display areas.
How to Make Polymer Clay Beads for Preppy Bracelets
This is where the real magic happens. Polymer clay gives you total creative control over the shape, color, and texture of your beads, and the technique is accessible even if you’ve never worked with clay before.
Choosing Your Color Palette
Preppy color palettes are very specific, and getting them right makes the difference between a bracelet that reads as “preppy” and one that just reads as “colorful.” The core preppy palette includes:
- Pastels: Soft pink, baby blue, lavender, mint green, butter yellow
- Classics: Navy blue, forest green, crisp white, warm cream
- Accents: Gold (for charm details), coral, and occasionally deep red or kelly green
This pink aesthetic and blue aesthetic combination is probably the most recognizable in the preppy world. When in doubt, stick to combinations that remind you of a summer afternoon at a country club or a New England beach town.
Conditioning and Coloring the Clay
Before shaping, polymer clay needs to be conditioned – worked with your hands until it’s smooth, pliable, and free of air bubbles. This takes about 2–3 minutes of kneading per portion. If you want custom colors, you can blend two base colors together during conditioning: a small amount of navy pressed into white clay will give you the kind of pale blue that defines the pink aesthetic and blue aesthetic pairing perfectly.
Shaping Your Beads
The most popular shapes for preppy bracelets are:
- Round/ball beads – the classic choice; roll a small portion of conditioned clay between your palms
- Disc beads – flatten a ball slightly; these stack beautifully and are great for monogram accessories when you press letter stamps into the surface
- Tube beads – roll clay into a short cylinder; these work well when alternated with seed beads
- Heart, star, or daisy shapes – use small cutters; these add a playful, cute energy to the bracelet
After shaping each bead, pierce it through the center with a blunt skewer or toothpick. Rotate the tool as you push to avoid distorting the shape. Leave the skewer in place during baking to maintain the hole shape.
Baking and Finishing
Most polymer clay brands cure at 230–275°F (110–135°C) for 15–30 minutes per ¼ inch of thickness. Check your specific clay’s packaging. Once cooled, sand the beads with 400-grit then 800-grit sandpaper for a smooth finish, and optionally seal with a clay-compatible gloss or matte varnish.
Stringing and Knotting
Cut elastic cord about 4 inches longer than your wrist measurement. String your beads in the desired pattern, then tie the ends with a surgeon’s knot: cross the right end over the left and pull through, then cross the right end over the left again and pull through. Pull the knot tight, add a drop of jewelry glue, and trim the ends. Tuck the knot into the nearest bead hole.
Pattern Ideas and Color Combinations Worth Trying
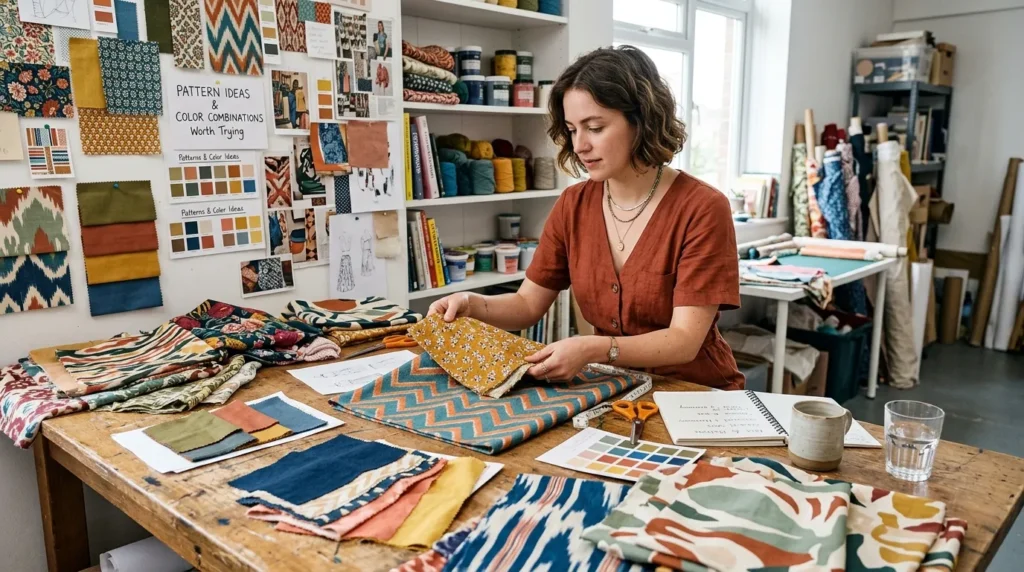
If you’re staring at a pile of beads unsure where to start, these combinations are consistently satisfying:
The Classic Prep Stack Alternate white disc beads with navy round beads. Add one or two gold-toned charm beads. This is the bracelet equivalent of a navy blazer – it works with almost everything.
Pastel Rainbow Arrange clay beads in ROYGBIV order, but use only the pastel version of each color. The effect is soft and graduated, like a watercolor wash.
Pink and Green A preppy hallmark. Alternate pink ball beads with forest green disc beads, with cream spacers between. This combination has been a cornerstone of the preppy aesthetic since at least the 1980s.
Monogram Accent String a set of uniform-colored beads (all lavender, or all white) with one or three letter beads spelling an initial or name. Simple, personal, and endlessly giftable as a personalized gift.
Summer Mood Board Use yellow, coral, turquoise, and white – this reads as beach-house-chic, especially on a summer bracelet stack. Perfect for summer crafts season.
DIY Preppy Accessories Beyond Bracelets: Keychains and More
Once you’ve got the clay bead technique down, it transfers directly to other handmade accessories. Preppy keychains follow the same basic construction – simply string a set of beads onto a thicker cord or chain, attach a keyring at one end, and add a tassel or charm at the other. These make genuinely good personalized gifts because they’re useful, not just decorative.
You can also use the same bead-making skills to create:
- Bag charms – attach a beaded strand to a lobster clasp that hooks onto a tote bag or backpack zipper
- Hair accessories – thread small clay beads onto thin elastic for a beaded hair tie
- Earring components – bake flat disc beads with a hole near the top and attach earring hooks
- Preppy phone cases – press small flat clay shapes onto a plain silicone case before baking, or glue cured beads and charms onto the surface for a textured, personalized look that ties directly into your bracelet palette
- Preppy backpack accessories – clip a beaded keychain or tassel charm onto your preppy backpack zipper pull to carry the aesthetic beyond your wrist
The same color palettes and personalization techniques apply across all of these. If you’re making a matching set – bracelet, keychain, phone case, and backpack charm – in the same color story, that becomes a cohesive handmade accessories collection that’s genuinely impressive.
Seasonal Approaches: Summer Crafts and Back-to-School DIY Projects
The bracelet-making calendar has two peak seasons, and it’s worth planning for both.
Summer Preppy Crafts
Summer is when most people discover this hobby or return to it after a break. The longer days and slower pace make it natural to sit down with a pile of clay and spend an afternoon making a bracelet stack. Summer-themed preppy bracelets lean into:
- Nautical motifs: anchor charms, rope-textured beads, navy and white
- Bright pastels: lemon yellow, watermelon pink, seafoam green
- Natural textures: wooden beads mixed with clay, shells as pendants
Summer is also the season when bracelet swapping becomes a social activity – making matching sets for friends, trading styles at camp or on vacation, building a stack that tells the story of your summer.
Back-to-School DIY Projects
The August–September window sees a huge spike in teen craft ideas and school supply customization. Preppy bracelets tie into this period because they’re one of the most visible accessories a student can wear – they’re on display every time you raise your hand in class or open your notebook.
Back-to-school bracelet projects often incorporate school colors, feature initial beads for personalization, or are made in bulk to give as friendship gifts on the first day. Combine this with other back-to-school DIY projects – handmade notebook covers, preppy desk decor, personalized tote bags for book carrying – and you have a full aesthetic kit going into the new school year. For inspiration on building that full preppy aesthetic from accessories to room setup, resources like Preppyglow offer genuinely useful style breakdowns.
The Preppy Aesthetic in Your Room: From Bracelets to Full Décor
Handmade bracelets don’t exist in isolation – they’re usually made in a space, displayed in a space, and worn out of a space. The overlap between preppy bracelets and preppy room decor is significant, and many crafters find that once they start making jewelry, they naturally expand into other aesthetic room decoration projects.
A bracelet display can itself be a piece of decor. A wooden dowel mounted on the wall, draped with a stack of colorful bracelets against a pink preppy decor backdrop, is visually cohesive and also practical. Pair it with:
- A preppy wall collage featuring photos, pressed flowers, and patterned paper
- Pastel desk decor including acrylic paint supply holders and cute stationery
- LED lights strung along a gallery wall for ambient lighting
- Washi tape accents on picture frames, mirror borders, and notebook covers
The preppy mirror decor trend specifically works well as a jewelry-adjacent project: use washi tape or painted wooden letters to frame a small vanity mirror, then display your bracelet collection on hooks beside it. It’s functional, photogenic, and deeply satisfying to put together.
If you’re working with a dorm room decor constraint – limited space, no wall damage – the same principles scale down beautifully. A small corkboard or pegboard leaned against a wall can hold both a bracelet display and a preppy wall collage without requiring a single nail.
Budget-Friendly DIY Crafts: What Things Actually Cost
One of the most appealing aspects of this hobby is that the barrier to entry is genuinely low. Here’s a realistic cost breakdown for starting from scratch:
| Item | Approximate Cost |
|---|---|
| Polymer clay variety pack (30+ colors) | $10–$20 |
| Elastic cord (5–10m spool) | $3–$6 |
| Bead tool set (roller, skewer, cutter) | $8–$15 |
| Glass seed beads (mixed pack) | $5–$12 |
| Embroidery floss (full color set) | $8–$15 |
| Washi tape (assorted pack) | $6–$10 |
| Clasps, jump rings, charms | $5–$10 |
| Total startup cost | $45–$88 |
That investment can produce 40–60 bracelets depending on how you use the materials. At that scale, the per-bracelet cost drops to well under $2 – which is why budget-friendly DIY crafts and preppy bracelet-making work so well together. The materials also serve multiple projects: the same clay pack can be used for keychains, phone case decorations, and earrings.
Lesser-Known Tips That Actually Change How Your Bracelets Turn Out
Most bracelet tutorials cover the basics, but a few things tend to get glossed over that make a meaningful difference in quality:
Bake on a paper towel, not directly on glass or ceramic. Beads baked directly on a hard surface can develop shiny flat spots where they contact the surface. A folded paper towel elevates them slightly and prevents this.
Condition clay in your hands, not on a table. The warmth of your palms conditions clay much faster and more evenly than kneading it on a hard surface.
Measure your wrist with elastic, not a tape measure. Elastic cord behaves differently than rigid measuring tape. Wrap the elastic around your wrist at the tightness you want, add your bead stack, and mark or tie before cutting. This gives you the actual bracelet length rather than a theoretical one.
Mix gloss and matte finishes intentionally. A stack of bracelets with all-matte beads can look flat. Mix a few glossy beads in – or finish some beads with varnish and leave others raw – for a more dynamic visual texture.
The surgeon’s knot beats any other finishing method for elastic. It sounds more complicated than a square knot, but it holds dramatically better and the extra 30 seconds are worth it every time.
Frequently Asked Questions About Preppy Bracelets
What’s the difference between preppy bracelets and regular friendship bracelets?
The distinction is mostly aesthetic rather than structural. Both can be beaded or woven, but preppy bracelets specifically follow the preppy aesthetic’s color palette (pastels, navy, white, green, coral) and often incorporate preppy motifs – monograms, nautical details, or classic stripe patterns. Friendship bracelets can be any color or style; preppy bracelets operate within a specific visual code.
How do you keep polymer clay beads from cracking?
Cracking usually comes from one of two causes: under-conditioning (the clay wasn’t worked enough before shaping) or baking at too high a temperature. Condition your clay until it’s smooth and consistent, and use an oven thermometer to verify your oven temperature – many home ovens run 10–25 degrees hotter than their display shows.
Can kids make preppy bracelets safely?
Yes, with some age-appropriate adjustments. Polymer clay is non-toxic when used as directed (and not ingested). The oven step should be supervised by an adult. For younger children (under 8), pre-made wooden or acrylic beads eliminate the clay-baking step entirely and still produce great-looking preppy bracelets. Teen craft ideas that involve polymer clay are generally appropriate from ages 10 and up with minimal supervision.
How many bracelets make a good preppy stack?
There’s no rule, but 3–7 bracelets is the range most people find works visually. Fewer than three can look sparse; more than seven can start to feel cluttered. The key is varying thickness and texture: mix thin woven bracelets with chunkier clay bead pieces, and vary colors within the same palette so the stack has visual movement without looking chaotic.
What’s the best way to store handmade preppy bracelets?
Avoid storing them in direct sunlight, which can fade both clay pigments and embroidery floss over time. A small wooden bowl, a bracelet holder dowel, or a velvet-lined tray all work well for daily-access storage. For longer-term storage or gifting, a small organza bag or a kraft paper gift box with tissue paper keeps them dust-free and undamaged. If you’re making personalized gifts, packaging is part of the presentation – a handmade bracelet in thoughtful packaging is a genuinely memorable gift.
How do preppy bracelets fit into a broader DIY aesthetic room decoration plan?
Preppy bracelets work as both wearable accessories and display objects. A well-organized bracelet display on your desk or vanity becomes part of your desk organization aesthetic. Combined with pastel craft ideas for other surfaces – preppy posters, decorative mirrors, washi tape accents, throw pillows in coordinating colors – they contribute to a room that feels intentional and personal rather than randomly assembled. The jewelry display is usually the most colorful and tactile part of a preppy-aesthetic setup, which makes it a natural focal point.
A Few Things People Get Wrong About This Style
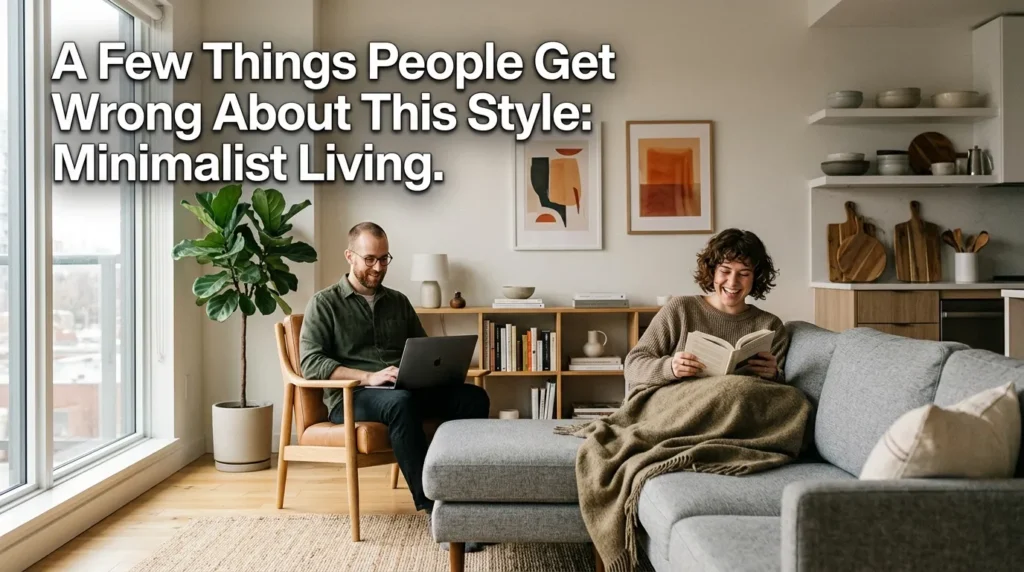
It’s worth addressing one common misconception: preppy bracelets are not just for a specific demographic or social group. The preppy aesthetic has been adopted, reinterpreted, and diversified substantially since its Ivy League origins. Today, the visual language of pastel colors, clean patterns, and handmade accessories belongs to anyone who connects with it – regardless of age, background, or budget.
The DIY angle actually democratizes the style more than almost anything else. When you make your own clay bead bracelets instead of buying a luxury version of the same aesthetic, you’re participating in the visual language while making it entirely your own. A $1.50 bracelet you made yourself, in exactly the colors you love, is more genuinely “you” than any store-bought alternative could be.
That’s probably the best argument for learning this skill: it’s not just about the bracelet. It’s about developing a creative practice that keeps giving you things you actually want to wear.