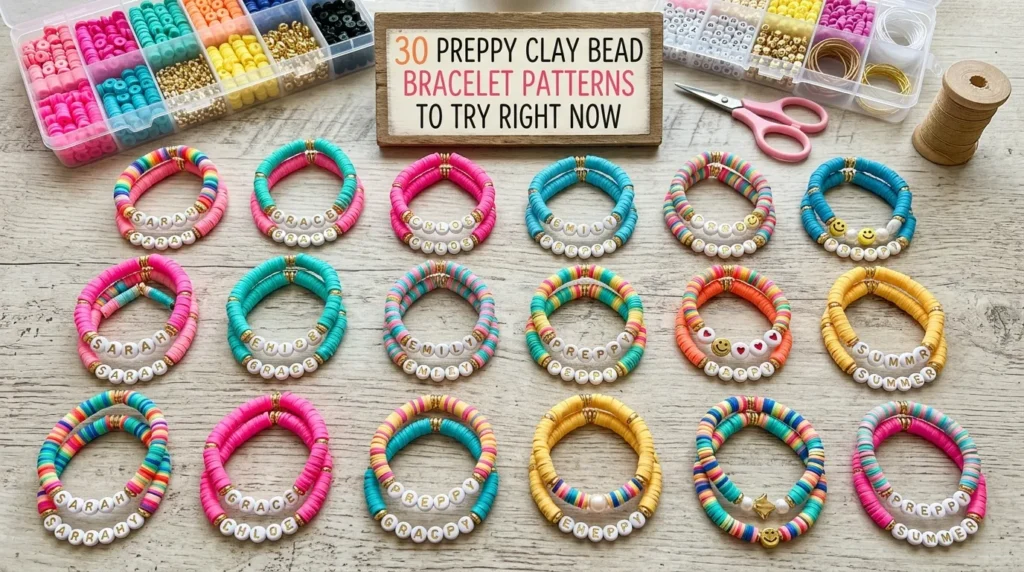
Preppy Clay Bead Bracelet Ideas: 30 Patterns to Make Right Now
There’s something almost meditative about threading tiny beads onto elastic cord – and when you’re working with a preppy color palette, the results land somewhere between a summer camp memory and a high-end accessory rack. Preppy clay bead bracelets have become one of the defining handmade fashion accessories of the past few years, and for good reason: they’re beginner-friendly, endlessly customizable, and deeply satisfying to wear in a stack. Preppy bracelets in particular have taken over social media feeds and school hallways alike, becoming a staple of the whole aesthetic.
This guide covers everything from foundational techniques to 30 distinct clay bead patterns – organized by difficulty, color story, and style – so whether you’re just getting started with DIY jewelry or looking to level up your bracelet-making game, there’s something here for you.
What Makes a Bracelet Truly “Preppy”?
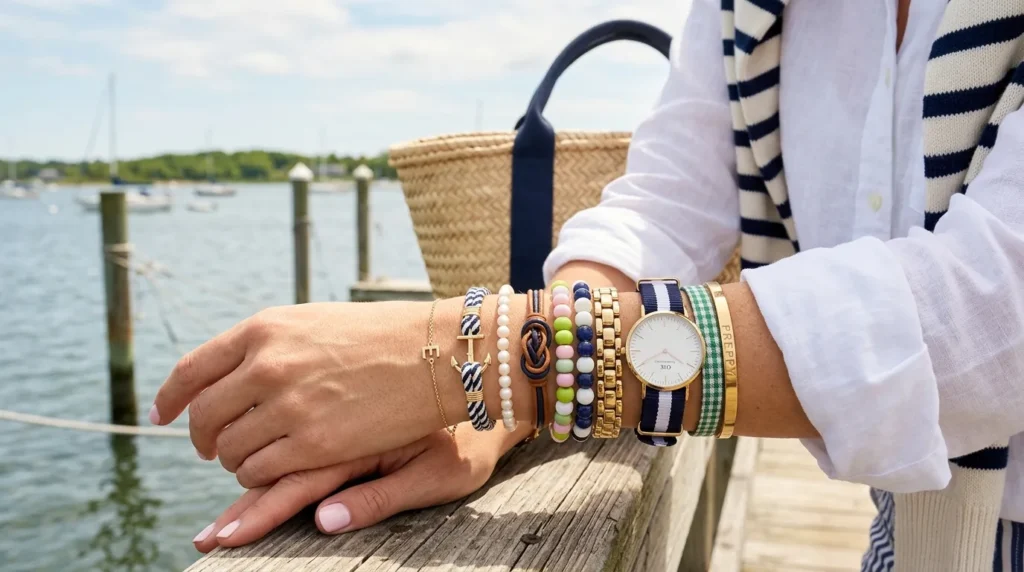
Before diving into patterns, it helps to understand what the aesthetic actually means. Preppy style has its roots in Northeastern American prep school and Ivy League culture from the mid-20th century, characterized by clean lines, bold color contrasts, and an almost deliberate cheerfulness. Think navy and white, kelly green and gold, pastel pink against crisp cream – color pairings with structure and intentionality behind them.
When that sensibility gets applied to beaded bracelets, you get something specific: not random rainbow strings, but considered color-blocked patterns, collegiate stripes, and combinations that look like they came from a sailing club gift shop. If you want a deeper dive into the style origins and how to apply it across your wardrobe, Preppyglow is a solid reference for preppy style guides and aesthetic inspiration.
Clay bead bracelets fit naturally into this world because polymer clay beads take color exceptionally well – they come in virtually every shade of a preppy color palette, from faded cornflower blue to saturated forest green. That consistency of tone is what separates a polished preppy bracelet from a craft fair grab-bag.
Everything You Need to Start Making Clay Bead Bracelets
Your Essential Bracelet Making Supplies
Getting the materials right makes the difference between a bracelet you’re proud to wear and one that breaks on the third day. Here’s what actually matters:
Polymer Clay Beads These are the star of the show. Polymer clay beads are lightweight, smooth, and available in a staggering range of colors. For preppy designs specifically, look for beads in saturated solids – avoid anything with glitter or mixed finishes unless you’re going for a very specific effect. Round beads in 6mm and 8mm are the most versatile sizes for bracelet making.
Elastic Cord / Stretch Cord The single most common beginner mistake is using flimsy elastic. For bracelets that actually hold up to daily wear, use 0.8mm or 1mm elastic cord. It threads easily through most standard bead holes and holds a knot without constant re-tying. Crystal elastic (the clear kind) tends to be more durable than opaque alternatives.
Scissors Sharp, clean-cutting scissors matter more than you’d think. Frayed cord ends won’t thread through beads cleanly, which turns the whole process frustrating.
Jewelry Glue A small dot of jewelry glue on your finishing knot extends the life of any elastic bracelet significantly. It’s an optional step that most beginners skip – until they’ve watched their bracelet fall apart at a bad moment.
Letter Beads and Spacer Beads Letter beads let you personalize a bracelet with initials, words, or short phrases – very on-brand for the friendship bracelet dimension of this style. Spacer beads (typically metallic or clear) create visual rhythm between your main beads and prevent designs from feeling dense.
Bead Organizer If you’re working with multiple colors or multiple patterns at once, a divided tray or bead organizer saves enormous amounts of time. Color coordination is much easier when you can see your palette laid out in front of you.
How to Make Clay Bead Bracelets Step by Step
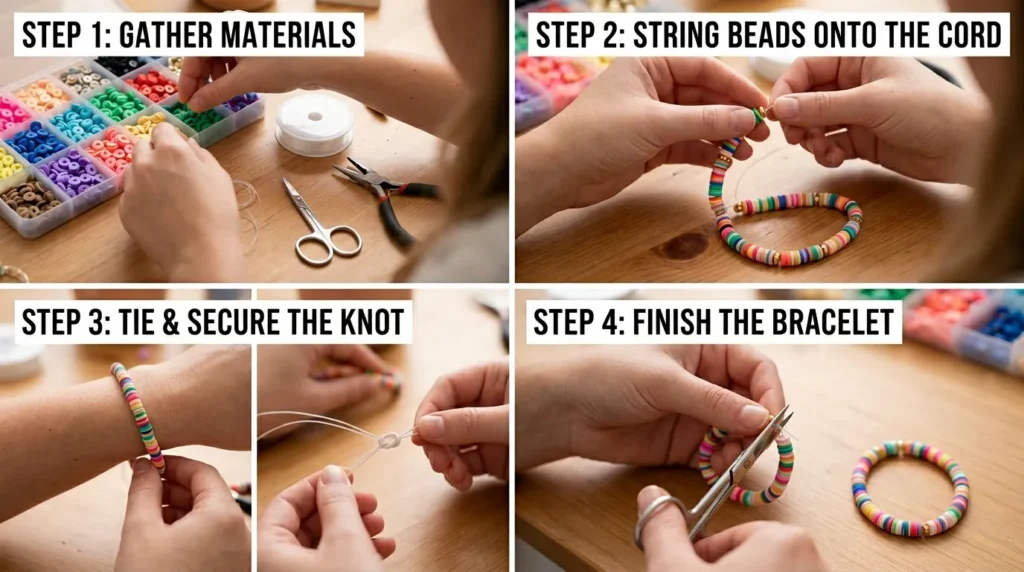
The actual process is simpler than most people expect. The tricky parts aren’t the threading – they’re the measuring and the knotting. Here’s how to get both right.
Step 1: Sizing and Starting Your Bracelet
Measure your wrist, then add approximately 0.5 to 1 inch of ease. This accounts for the way the bracelet needs to stretch over your hand. For most adults, a finished bracelet length of 6.5 to 7.5 inches works well; for kids, aim for 5.5 to 6 inches.
Cut your elastic cord to about 12 inches – this gives you ample length to work with and enough tail on each end to tie a secure knot. If you’re using a bead organizer, lay out your beads in the planned pattern before you start threading. Changing your mind mid-thread is maddening.
Step 2: Bead Threading Techniques and Building the Pattern
Thread your first bead and hold it loosely near the center of your cord length (not the end). Work through your planned pattern one bead at a time. For color block patterns, group 3–5 consecutive beads of the same color before transitioning. For ombré designs, transition gradually through one bead at a time.
If you’re incorporating letter beads or spacer beads into the design, place them as you go – don’t try to insert them afterward. The bead threading process is linear and retroactive adjustments are difficult on elastic.
Keep gentle tension on the cord as you work. If the elastic is too slack, beads slide around and the pattern becomes inconsistent.
Step 3: Bracelet Knotting and Finishing
Once all beads are threaded and the length checks out against your wrist, it’s time to close the bracelet. Bring both cord ends together and tie a surgeon’s knot: right over left, then left over right, pulling firmly after each pass. Unlike a standard square knot, the surgeon’s knot grips elastic without slipping.
After tying, add a small drop of jewelry glue directly to the knot. Let it dry for 30–60 seconds, then trim the excess cord tails as close to the knot as possible. Gently rotate the knot into the hole of the nearest bead so it disappears inside – this is what separates a clean, finished-looking bracelet from a casual craft.
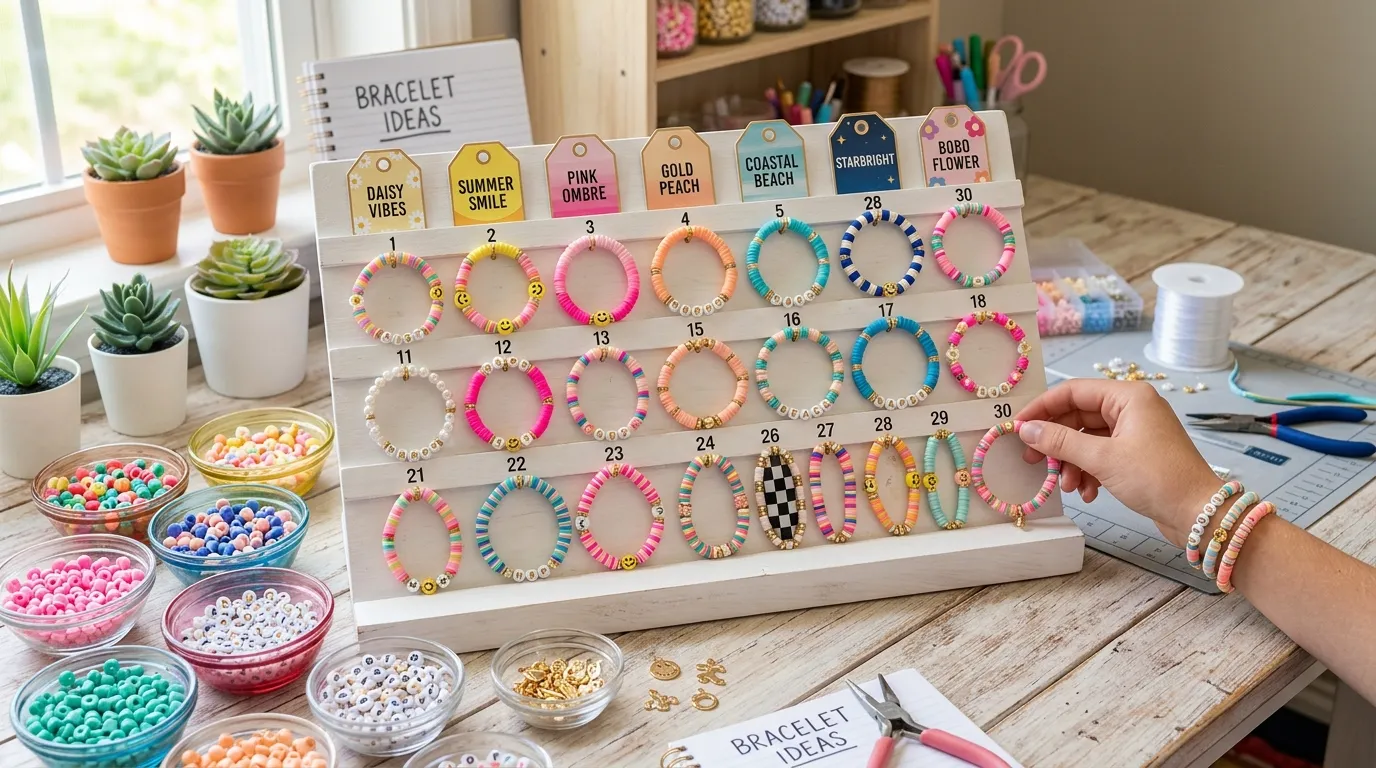
30 Preppy Clay Bead Bracelet Patterns to Try Right Now
This is the section most people are really here for. The patterns below are organized loosely from accessible to more involved, but none of them require advanced jewelry crafting skills. What they do require is attention to color coordination and a little patience with sequencing.
Pattern Group 1: Classic Solid and Stripe Designs
Pattern 1 – The Random Mix (Controlled Chaos) This is technically the easiest pattern but requires the most restraint: choose five to seven colors from a single preppy palette (navy, white, red, kelly green, gold) and thread them in a genuinely random sequence. The trick is limiting yourself to that palette – randomness within constraints reads as intentional.
Pattern 2 – White with Colored Bands and Heart Accents Alternate runs of white beads with single-bead color accents in red or navy. Insert small heart-shaped beads at evenly spaced intervals. This is the most directly romantic of the classic preppy designs and works beautifully as a friendship bracelet.
Pattern 3 – Nautical Navy Stripe Three white, one navy, three white, one navy – repeat. Anchor the pattern with a single gold spacer bead on each side of the closure knot. Clean, collegiate, and endlessly wearable.
Pattern 4 – Color Blocked Segments This is the most distinctly preppy of all patterns: three to five beads of one solid color, then an abrupt shift to three to five beads of a contrasting color. No gradients, no blending – just bold, deliberate blocks. Navy/white/red is classic; Kelly green/gold/white is a close second.
Pattern 5 – The Prep School Plaid Alternate one white bead, one color (say, burgundy), one white, one contrasting color (navy), and repeat. When worn in a stack, multiple bracelets with this pattern create a plaid-like visual effect.
Pattern Group 2: Gradient and Sunset Themes
Pattern 6 – Sunset Ombré Start with deep coral or orange-red, transition through salmon and peachy tones, ending at soft cream or white. This is a true ombré bracelet design – each bead should shift one step lighter along the gradient. It takes planning but the payoff is a bracelet that genuinely looks like a painted piece.
Pattern 7 – Sunset with Gold Bands Take the sunset color theme above and interrupt it at even intervals with a single gold metallic spacer bead. The gold bands add structure and a slightly elevated, handmade fashion accessory feel.
Pattern 8 – Ocean Ombré Deep navy to medium blue to sky blue to pale aqua. This version of the ombré pattern leans more into coastal preppy territory – perfect summer jewelry ideas for anyone near water.
Pattern 9 – Lavender to White Fade Start at saturated violet, move through lavender, lilac, and soft blush, ending at white. Softer than most preppy palettes but unmistakably in the aesthetic family.
Pattern 10 – Forest to Gold Deep forest green transitioning through sage and ending at warm gold. Earthy but structured – a fall-appropriate take on the gradient format.
Pattern Group 3: Minimalist Bracelet Styles
Pattern 11 – Single Color Statement One color, all the way through, with two gold spacer beads flanking the closure. The simplicity is the point. Works best in a rich, saturated shade – hunter green, deep coral, or navy.
Pattern 12 – Cream and One Accent Mostly cream beads with three to five accent beads in a single pop color at the center. Understated and stackable.
Pattern 13 – Metallic and Matte Alternating Alternate metallic gold beads with matte navy or white beads. The contrast in finish creates visual interest without relying on multiple colors.
Pattern 14 – White with Single Letter Initial All white with a single letter bead at the center – your initial or a friend’s. The most direct expression of the personalized friendship bracelet tradition in minimal form.
Pattern 15 – Three-Color Minimal Repeat a three-bead unit of white, one color, white throughout the entire bracelet. Extremely clean and very easy to scale up for gifting in bulk.
Pattern Group 4: Personalized and Letter Bead Designs
Pattern 16 – Name Bracelet with Flanking Colors Spell out a name or word in letter beads, flanked on each side by a coordinating color block. This is one of the more time-consuming designs on this list but among the most meaningful as a handmade gift idea.
Pattern 17 – Initials and Symbols Combine letter beads for initials with small symbol beads (stars, hearts, anchors) and fill the remainder with a solid color. Very popular in teen fashion accessories circles.
Pattern 18 – Word Bracelets: “LOVE,” “VSCO,” “BEACH” Short words work especially well because they fill a bracelet length naturally. Pair the word in white letter beads against a solid colored background.
Pattern 19 – Best Friends Set Make two matching bracelets – one says “BEST,” one says “FRIEND” – in matching color schemes. The ultimate friendship bracelet, updated for the clay bead era.
Pattern 20 – Birthday Month Colors Research the birthstone color for a month and build a bracelet around that color palette. Thoughtful, personal, and a great entry point for customizing handmade accessories for gifts.
Pattern Group 5: Advanced Patterns and Stacking Sets
Pattern 21 – Checkerboard Strict alternation between two colors – one black, one white, or one navy, one cream – creates an optical checkerboard effect. Requires precision in bead selection (beads must be uniform in size for this to read clearly).
Pattern 22 – Rainbow Preppy (Structured) All seven rainbow colors, but in a specific order (ROYGBIV) and each represented by exactly three beads. Far more structured than a standard rainbow bracelet, it reads as deliberate rather than childish.
Pattern 23 – Dual Stripe Two colors alternating in pairs: two navy, two white, two navy, two white. A subtle variation on the basic stripe that creates a slightly different visual rhythm.
Pattern 24 – Stacking Set: Prep School Three-Pack Design three coordinating bracelets meant to be worn together: one solid color, one stripe, one ombré – all within the same color family. This is how the aesthetic jewelry trends around clay beads are actually being styled.
Pattern 25 – Pastel Party Five soft pastel tones in rotating groups of two beads each: blush, mint, lavender, butter yellow, baby blue. When stacked with neutral bracelets, the result reads as curated and intentional rather than chaotic.
Pattern 26 – Holiday Colorways Apply the color block pattern format to seasonal palettes: red and green for winter, orange and black for fall, pastels for spring. Same structure, rotated color story.
Pattern 27 – Preppy Monogram Stack Three bracelets: first letter of first name, middle initial, last name initial – each in its own solid color with the letter at center. A sophisticated take on the letter bead design.
Pattern 28 – Club Colors Build a bracelet in the exact colors of a sports team, school, or club. Color coordination toward a specific reference point creates a bracelet with inherent meaning beyond the craft itself.
Pattern 29 – Tonal Texture Mix Stay within one color family but vary the finish: matte, metallic, and satin beads all in shades of blue, for instance. The result is a subtly dimensional bracelet that photographs beautifully.
Pattern 30 – The Full Preppy Stack Plan a set of five to seven bracelets designed to be worn together: solid navy, color block navy/white, ombré blue, letter bracelet, nautical stripe, sunset gradient, and one metallic accent bracelet. This is the endgame of preppy clay bead bracelet making – a complete, cohesive wrist stack.
Pattern Comparison: Which Style Works Best for You?
| Pattern Type | Difficulty | Best For | Time to Complete | Stackability |
|---|---|---|---|---|
| Random Mix | Easy | Beginners | 10–15 min | High |
| Color Block | Easy | Clean aesthetic look | 10–15 min | Very High |
| Ombré / Gradient | Medium | Statement pieces | 20–25 min | Medium |
| Letter / Word | Medium | Personalized gifts | 20–30 min | Low–Medium |
| Minimalist Single Color | Easy | Everyday wear | 8–10 min | Very High |
| Stacking Set | Medium–Hard | Full wrist look | 45–90 min | Very High |
| Checkerboard | Hard | Advanced crafters | 25–35 min | Medium |
| Nautical Stripe | Easy | Classic preppy | 10–15 min | Very High |
Preppy vs. Boho vs. VSCO: How These Bead Bracelet Styles Differ
It’s worth being clear about what separates preppy clay bead bracelets from adjacent styles, since they can look superficially similar but come from very different aesthetic languages.
Preppy leans on structured color relationships – contrasting blocks, defined stripes, collegiate palettes. The emphasis is on intentionality and a sense of earned polish. Bracelet designs tend to be clean-edged.
Boho embraces earthier tones (terracotta, rust, ochre, cream), mixed textures, and a more organic randomness. Where preppy is sailor’s flag, boho is desert sunrise.
VSCO overlaps with both but prioritizes pastel softness and a DIY-meets-Instagram sensibility. Think
scrunchie-adjacent: trendy bracelet designs with a casual warmth that’s less structured than preppy, less earthy than boho.
You can blend elements – a preppy color palette on a VSCO-style random mix, for instance – but understanding the distinctions makes intentional design choices much easier. It also helps to think about your bracelets as part of a broader look. Preppy phone cases, for example, often use the same color-blocked navy, green, and white palettes that work so well in bead patterns – matching your bracelet stack to your phone case is an easy way to pull an outfit together. Similarly, if you carry a preppy backpack in classic stripes or bold solid colors, coordinating your handmade bracelet colors to that palette creates a cohesive, put-together aesthetic without much effort. More on the overall preppy aesthetic at Preppyglow, which covers how these style identities intersect across accessories.
Lesser-Known Insights About Clay Bead Bracelet Making
Most tutorials skip a few things that turn out to matter quite a bit in practice.
Bead hole size varies dramatically. Not all polymer clay beads are created equal – some manufacturers drill wider holes, which means your elastic may slip through too loosely and the bracelet will feel floppy. When in doubt, size down your cord or add a knot before the first bead.
Color fades unevenly in stacks. If you wear a stack of colorful bead bracelets regularly, the ones in the middle of the stack fade slower than those on the outside – the middle position protects them from UV and friction. Rotate your stack periodically to even out wear.
Elastic degrades faster than the beads. The beads themselves can last for years; the cord usually needs replacement after six to twelve months of daily wear. Learning to re-string a bracelet is just as useful a skill as making it the first time.
Sizing for kids requires specific adjustment. For kids’ craft activities, use beads with larger holes (the 8mm or 10mm size) and slightly lighter elastic. Smaller wrists mean shorter lengths (aim for 5 to 5.5 inches), but the real difference is making the elastic loose enough to slip on and off easily without untying.
Frequently Asked Questions About Clay Bead Bracelets
How long should a clay bead bracelet be?
The standard bracelet sizing guide for adults puts the target finished length between 6.5 and 7.5 inches, with 7 inches as the most common sweet spot. For a snug fit, use your actual wrist measurement; for a looser, stackable look, add a full inch. Kids’ bracelets typically range from 5 to 6 inches. Always measure twice – elastic doesn’t stretch infinitely, and a bracelet that’s too short won’t go over the hand at all.
How many clay beads do I need to make a bracelet?
The number of beads per bracelet depends on the bead size and the desired bracelet length. As a general rule: 6mm beads require approximately 28–34 beads for an adult bracelet; 8mm beads require roughly 22–26; 10mm beads need around 18–22. These are estimates – always lay your beads out along a measured length of cord before threading to confirm. Bead counts also change if you’re mixing sizes or including spacer beads.
What is the best string to use for clay bead bracelets?
For durability, 0.8mm or 1mm clear elastic cord is the standard recommendation among experienced DIY bead bracelet makers. Crystal elastic tends to hold knots more securely than fabric-covered elastic and is less likely to fray when cut. Avoid very thin elastic (under 0.5mm) – it works for lightweight seed beads but won’t hold up well under the weight and friction of polymer clay beads with regular wear.
Which clay beads are the best for bracelets?
Smooth, uniform polymer clay beads with cleanly drilled holes are the benchmark. For preppy bracelet designs specifically, matte-finish beads tend to photograph better and look more polished than high-gloss alternatives. The most important practical quality is consistent hole size – beads from the same set should thread consistently without forcing. Avoid beads with very thin walls around the drill hole, as these are more prone to cracking over time.
How do I keep my clay bead bracelet from untying or breaking?
The two most effective techniques are the surgeon’s knot (described in the instructions above) and a dot of jewelry glue applied to the finished knot before trimming the tails. Tucking the knot inside a bead hole also protects it from external friction. Beyond the finishing technique, preventing bracelet breakage comes down to elastic quality – cheap elastic will break regardless of how well you knot it. Replace the elastic every six to twelve months for daily-wear pieces even if the knot still looks intact, as elastic degrades internally before it shows external signs of wear.
Are clay bead bracelets waterproof?
The polymer clay beads themselves are water-resistant – they won’t absorb water or lose their color when wet. The vulnerability is the elastic cord: repeated exposure to water (showering, swimming, washing hands) weakens elastic faster than normal wear. If you want to maximize the lifespan of your bracelets, take them off before water activities. If you prefer to leave them on, factor in more frequent re-stringing – roughly every four to six months with regular water exposure rather than every twelve months with dry wear.
Making Clay Bead Bracelets a Craft Habit, Not Just a One-Time Project

The craft hobby dimension of bead bracelet making is genuinely undervalued. Once you have your core supplies – a selection of polymer clay beads in a working palette, quality elastic cord, scissors, and glue – you can produce a finished bracelet in under 20 minutes. That makes it one of the most accessible creative DIY projects for adults, teens, and kids alike.
What keeps people coming back isn’t just the speed; it’s the problem-solving dimension of color coordination. Every new bracelet is a small design challenge: which colors to combine, how to sequence them, whether to add a letter bead or keep it purely geometric. That’s the core appeal of beading patterns inspiration – there’s always another variation to explore, another palette to try, another person to make something for.
For a creative DIY project with immediate, wearable results and a clear entry point at any skill level, preppy clay bead bracelets are hard to beat. Start with a color block, graduate to an ombré, then build your first stacking set – and somewhere in that progression, you’ll probably figure out which of the 30 patterns on this list is actually yours.